The Linux KVM is a hypervisor software implemented as a kernel module of Linux operating system. A hypervisor software provides virtual CPU, memory, hard disk etc. to run multiple virtual machines on a single physical machine. The Linux KVM supports full virtualization using hardware virtualization assistance such as Intel(R) VT-x or AMD-V.
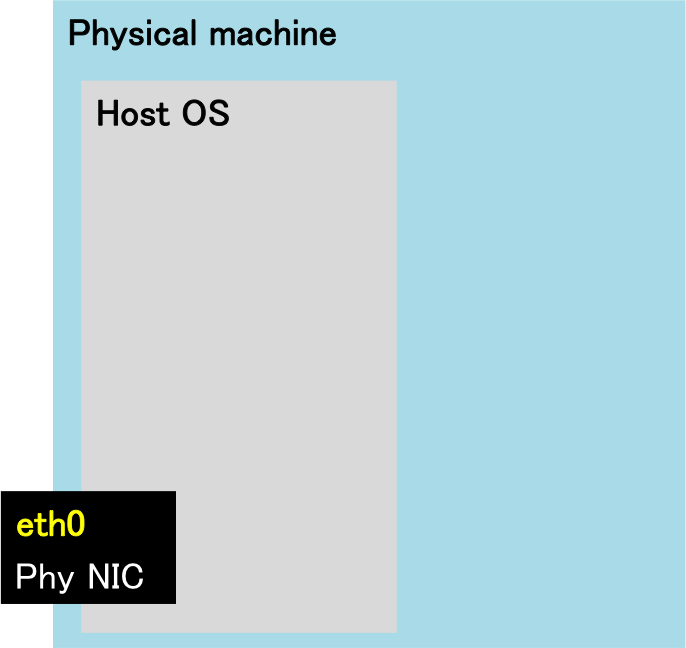
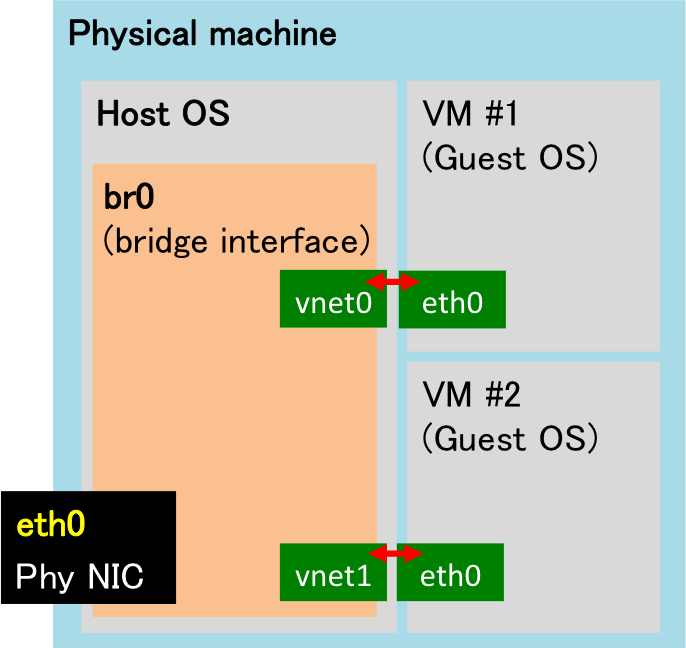
The important design in installing the Linux KVM is bridge networks. Figure 1 illustrates the generic (default) network configuration of Linux operating system. A phyiscal ethernet network interface such as eth0 or em1 is configured as a layer 3 (i.e., IP) interface to have an IPv4 address (and/or one or more IPv6 addresses). However, this configuration is not suitable for hypervisor to provide the external network to internal virtual machines because all packets are terminated at this interface. To provide the external network to internal virtual machines, we configure a bridge interface, which works like a switch (switching hub) as shown in Figure 2. A bridge interface performs as a layer 3 (i.e., IP) interface of the host operating system as well as a switch. The bridge interface is connected to external physical interfaces and to virtual network ports directed to virtual machines (vnet0 and vnet1 in Figure 2). Thus, virtual machines get virtual network interfaces that reach external connections through the bridge interface.
In order to use bridge interfaces, we first need to install bridge utilities (and a kernel module, bridge). In Ubuntu server, you can install them by the following command.
$sudo apt-get install bridge-utilsThen we will configure a bridge interface in the start-up configuration file, /etc/network/interfaces. We will rearrange the static IP address configuration of a physical interface such as eth0 and em1 to a bridge interface named br0 as follows.
# This file describes the network interfaces available on your system
# and how to activate them. For more information, see interfaces(5).

# The loopback network interface
auto lo
iface lo inet loopback

# The primary network interface ## Note that eth0 may be em1 or another in your environment.
auto eth0
iface eth0 inet manual
        pre-up ifconfig eth0 up

auto br0
iface br0 inet static
        address 157.82.3.<1XY>
        netmask 255.255.255.0
        network 157.82.3.0
        broadcast 157.82.3.255
        gateway 157.82.3.1
        dns-nameservers 133.11.169.11 157.82.3.2
        dns-search exp.ci.i.u-tokyo.ac.jp
        bridge_ports eth0  ## may be different name in your environment
        bridge_stp off
        bridge_maxwait 0
        bridge_fd 0
# This is an autoconfigured IPv6 interface
iface br0 inet6 auto
In the configuration, the bridge_ports attribute specifies a set of interfaces that attach to this bridge interface. The bridge_stp attribute turns on/off the spanning tree protocol. The bridge_maxwait attribute configures the maximum time that the bridge setup scripts will wait for the bridge ports to get to the forwarding status. The bridge_fd attribute specifies the bridge forward delay to mitigate flapping. However, it leads to delay to recovery from live migration. Therefore, it is recommended to be set to 0 if you plan to use live migration.
After carefully look at the configuration, reboot the host machine and activate the new configuration.
Note that the bridge utilities provide a bunch of command line tools to operate bridge interfaces. For example,
$sudo brctl showdisplays a list of bridge interfaces, bridge ID, spanning tree information, and the attached physical or virtual interfaces. To investigate the forwarding table of a bridge interface,
$sudo brctl showmacs <bridge-interface-name>will list the learned MAC address table in the specified bridge interface. This may help you troubleshoot.
The Linux KVM is managed under the package management system, apt, in the Ubuntu server, and consequently, it is very easy to install. Just execute:
$sudo apt-get install kvmWe will also install CLI and GUI tools (e.g., libvirt-bin, virt-manager) for the operation of hypervisor with the following command.
$sudo apt-get install libvirt-bin virt-managerI would like to recommend you to use CLI, but it would presumably be hard for some of you. So, we will get start it using GUI, virt-manager. Note that we avoid installing unnecessary software to make the host more secure and to reduce maintenance cost and time for software updates. Therefore, we DO NOT install GUI (e.g., window manager) on the host machine but just use the X server (like remote desktop server) through X11 forwarding over SSH. To forward X application windows of the remote host to your local machine, please login to the hypervisor by SSH with the -X option.
CLIENT$ssh -X <user>@gXsY.exp.ci.i.u-tokyo.ac.jpThen please launch virt-manager at the hypervisor machine:
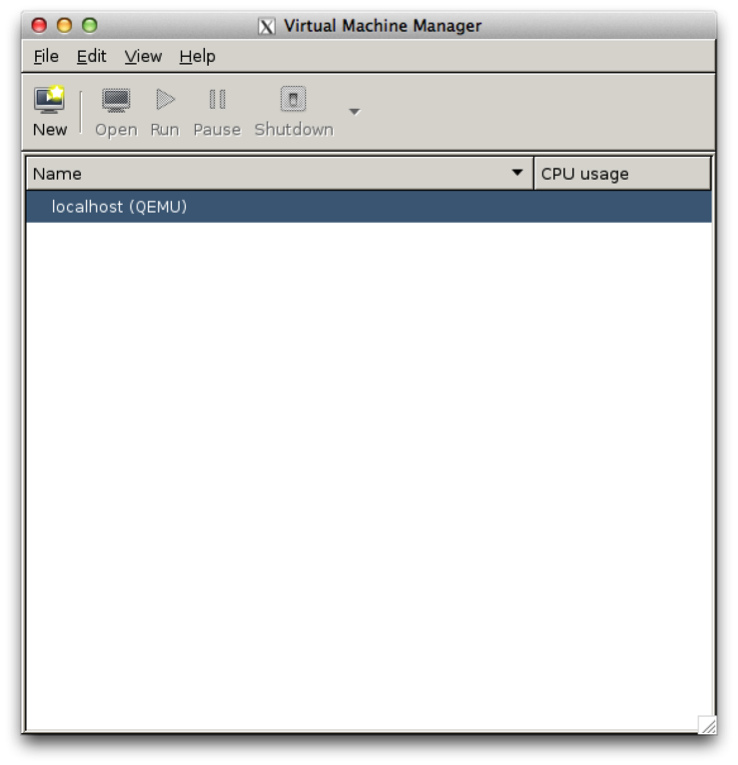
gXsY$sudo HOME="$HOME" virt-managerThe virt-manager's GUI will appear in your client machine as shown in Figure 3. The user interface is quite simple and intuitive to operate the hypervisor, so I do note note how to use it here.
Note that you need to install X11 client to your client before this operation. For OS X, you can use XQuartz.