Installation of Linux operating system (Ubuntu server)
After completing the assembly of your cloud hosts,
you will install a Linux operating system onto these hosts and set it up.
We use Ubuntu server (14.04 LTS), one of the most popular distributions
of Linux operating system in this course.
You will also set up the network interface and the SSH server
to access the machine from your remote client.
This page is boring for many of you but I provide it
as my comprehensive note of this course.
Installation process
The installation process of Ubuntu server is quite simple and easy.
All what you need to do is to follow the instructions.
I summarize the process here before you enter to the process
for your better understanding as follows:
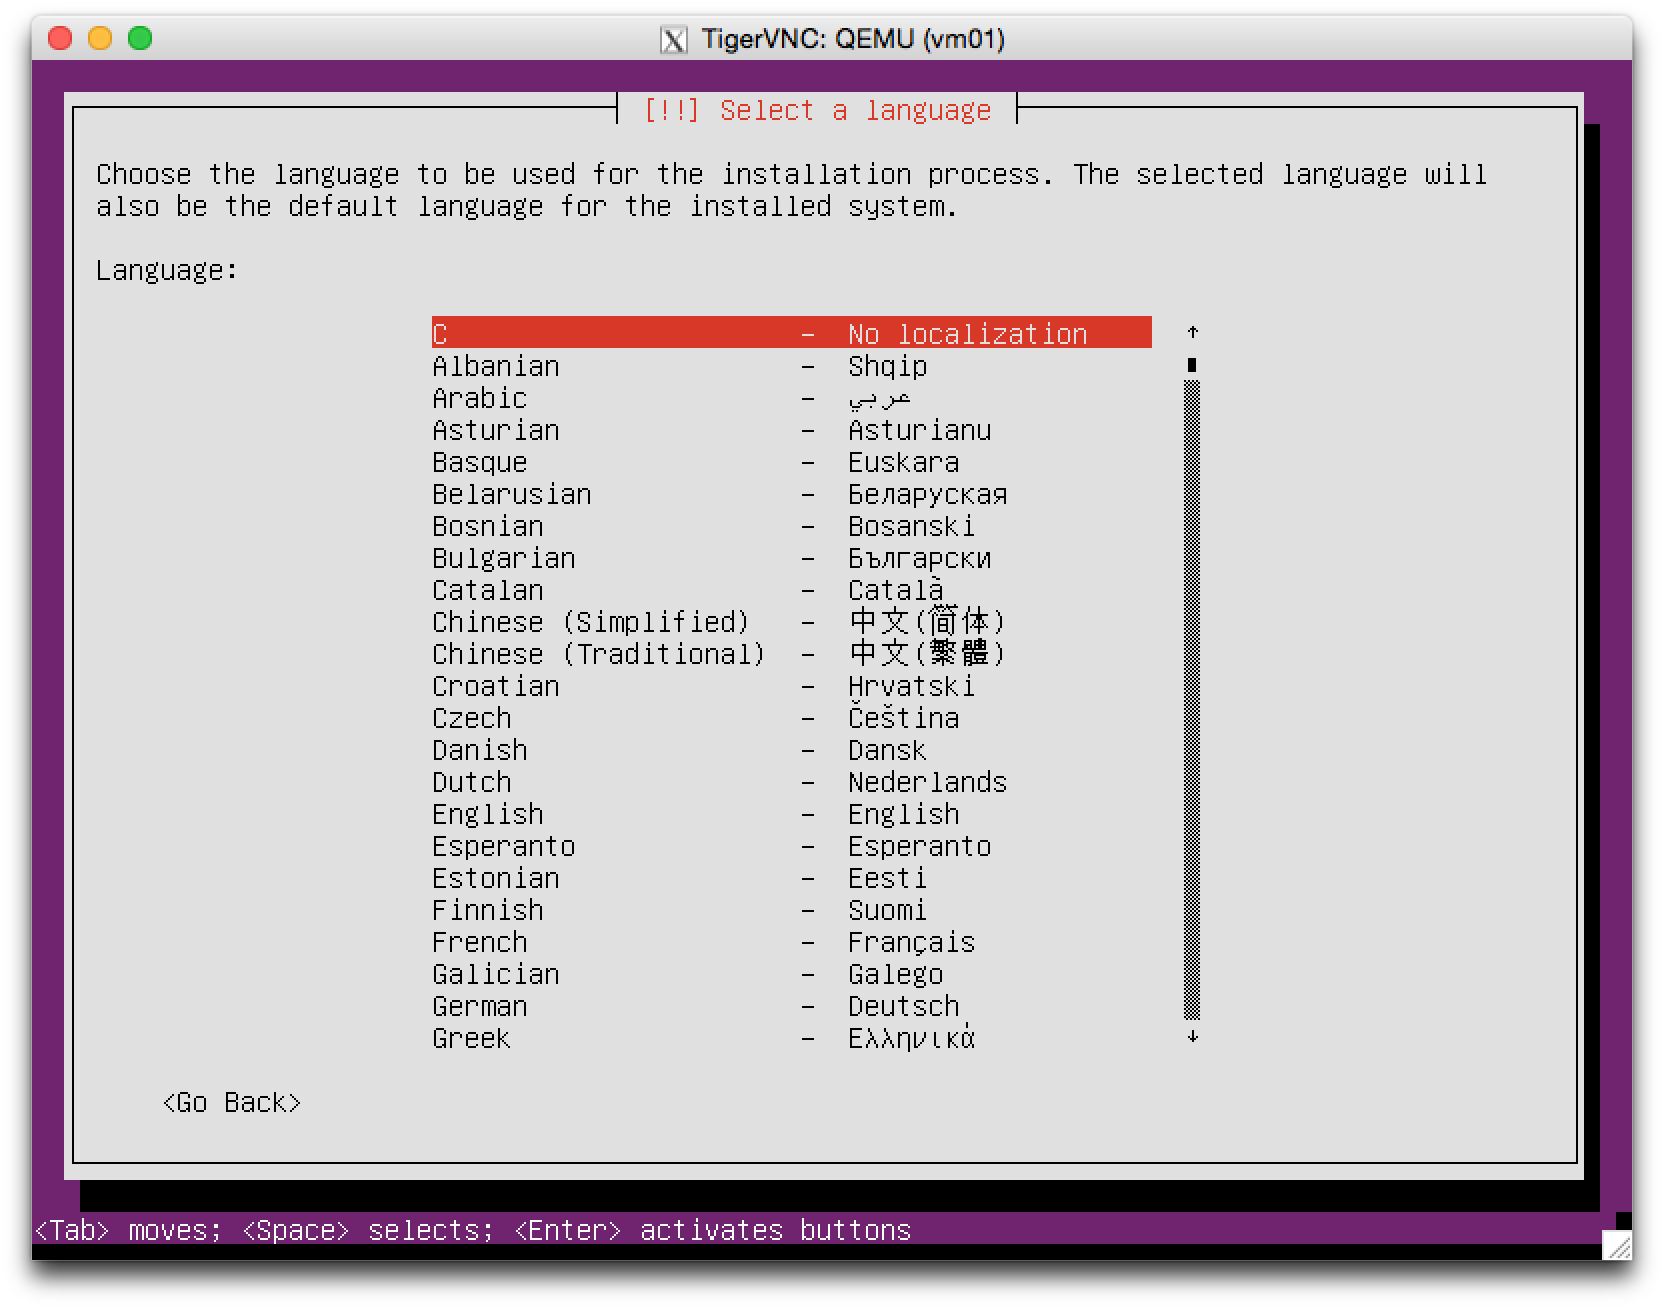
The installer asks your preferred language used in the following programs
as soon as it is loaded from the install disc/disk image and executed.
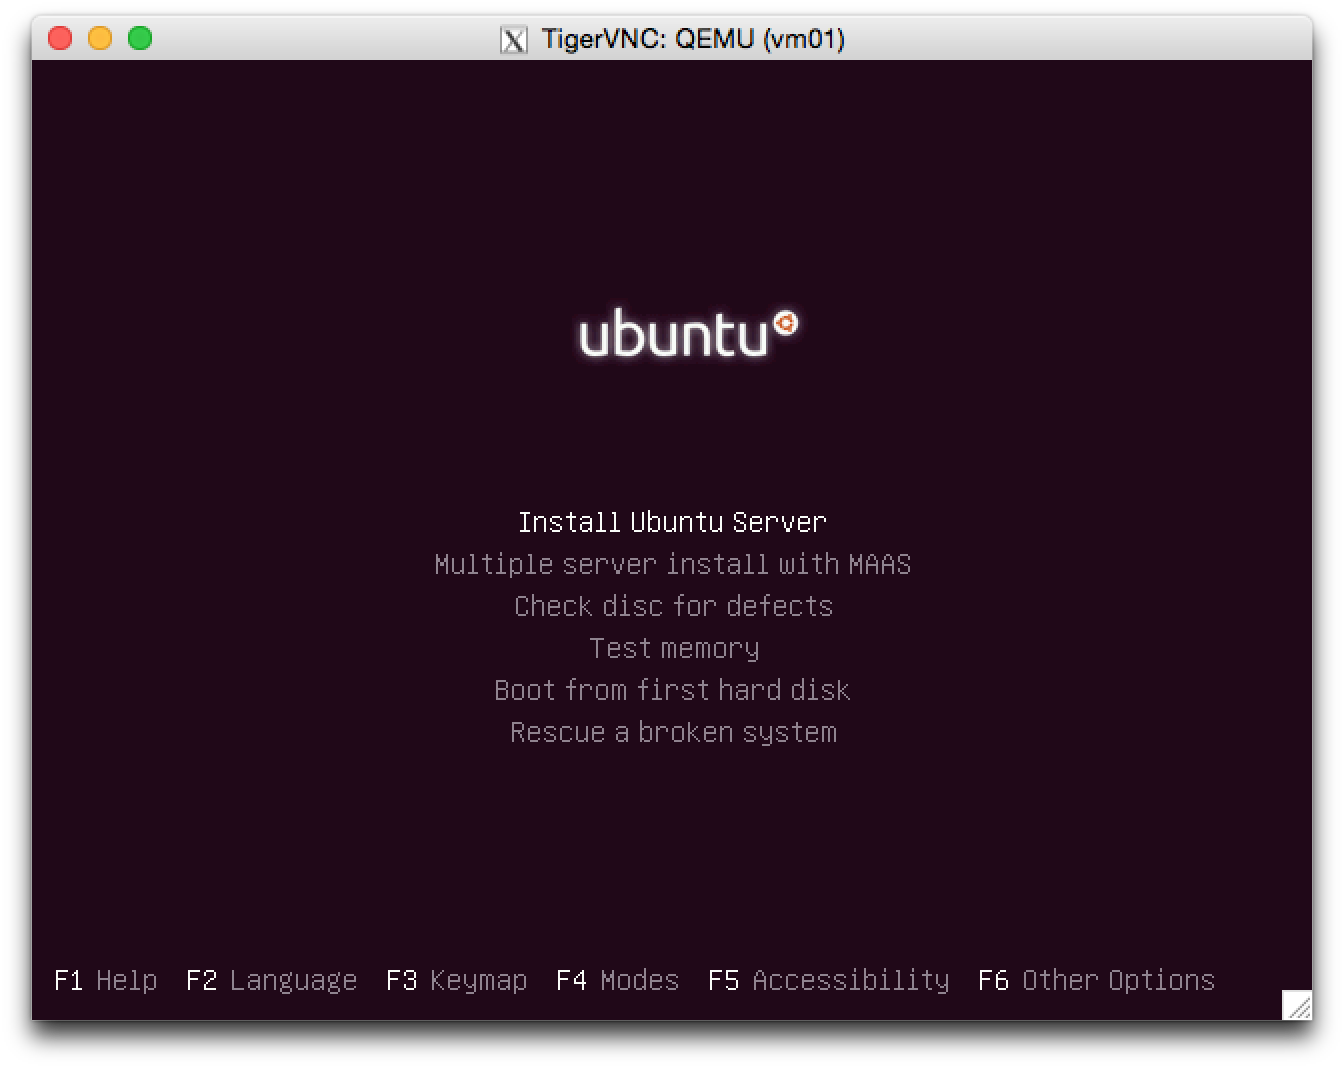
The installer contains several fundamuntal programs
(e.g., memory test program) as well as the installer.
Of course, we need to choose and launch the installer in this step.
Then, the installer asks you the localization option (i.e., language) for the installed system.
This is not for the installer's language but for the installing/installed system.
“C” is recommended for Japanese students because
“Japanese” is sometimes troublesome for the command line operation.
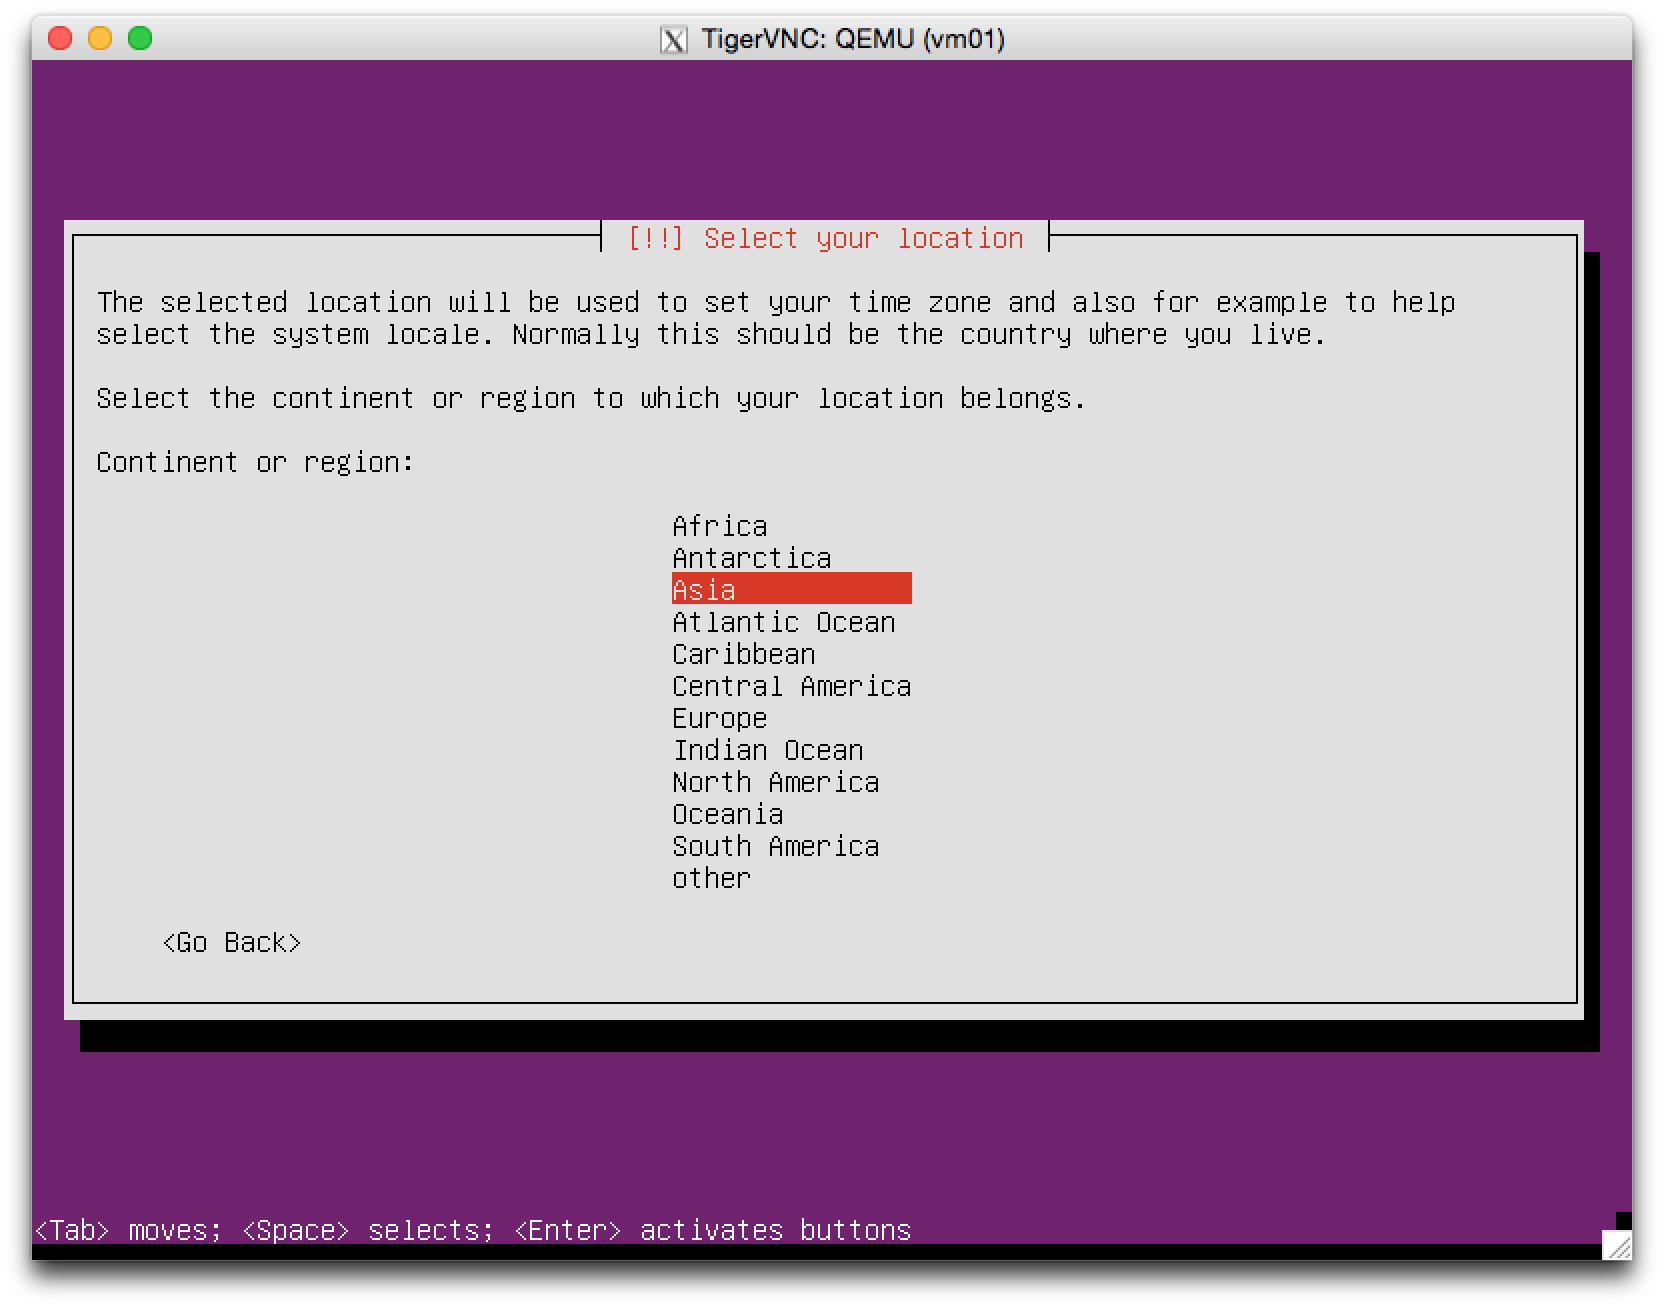
The install will configure the system's timezone from your location.
Choose the region of your country to search your country from a list of countries in the selected region.
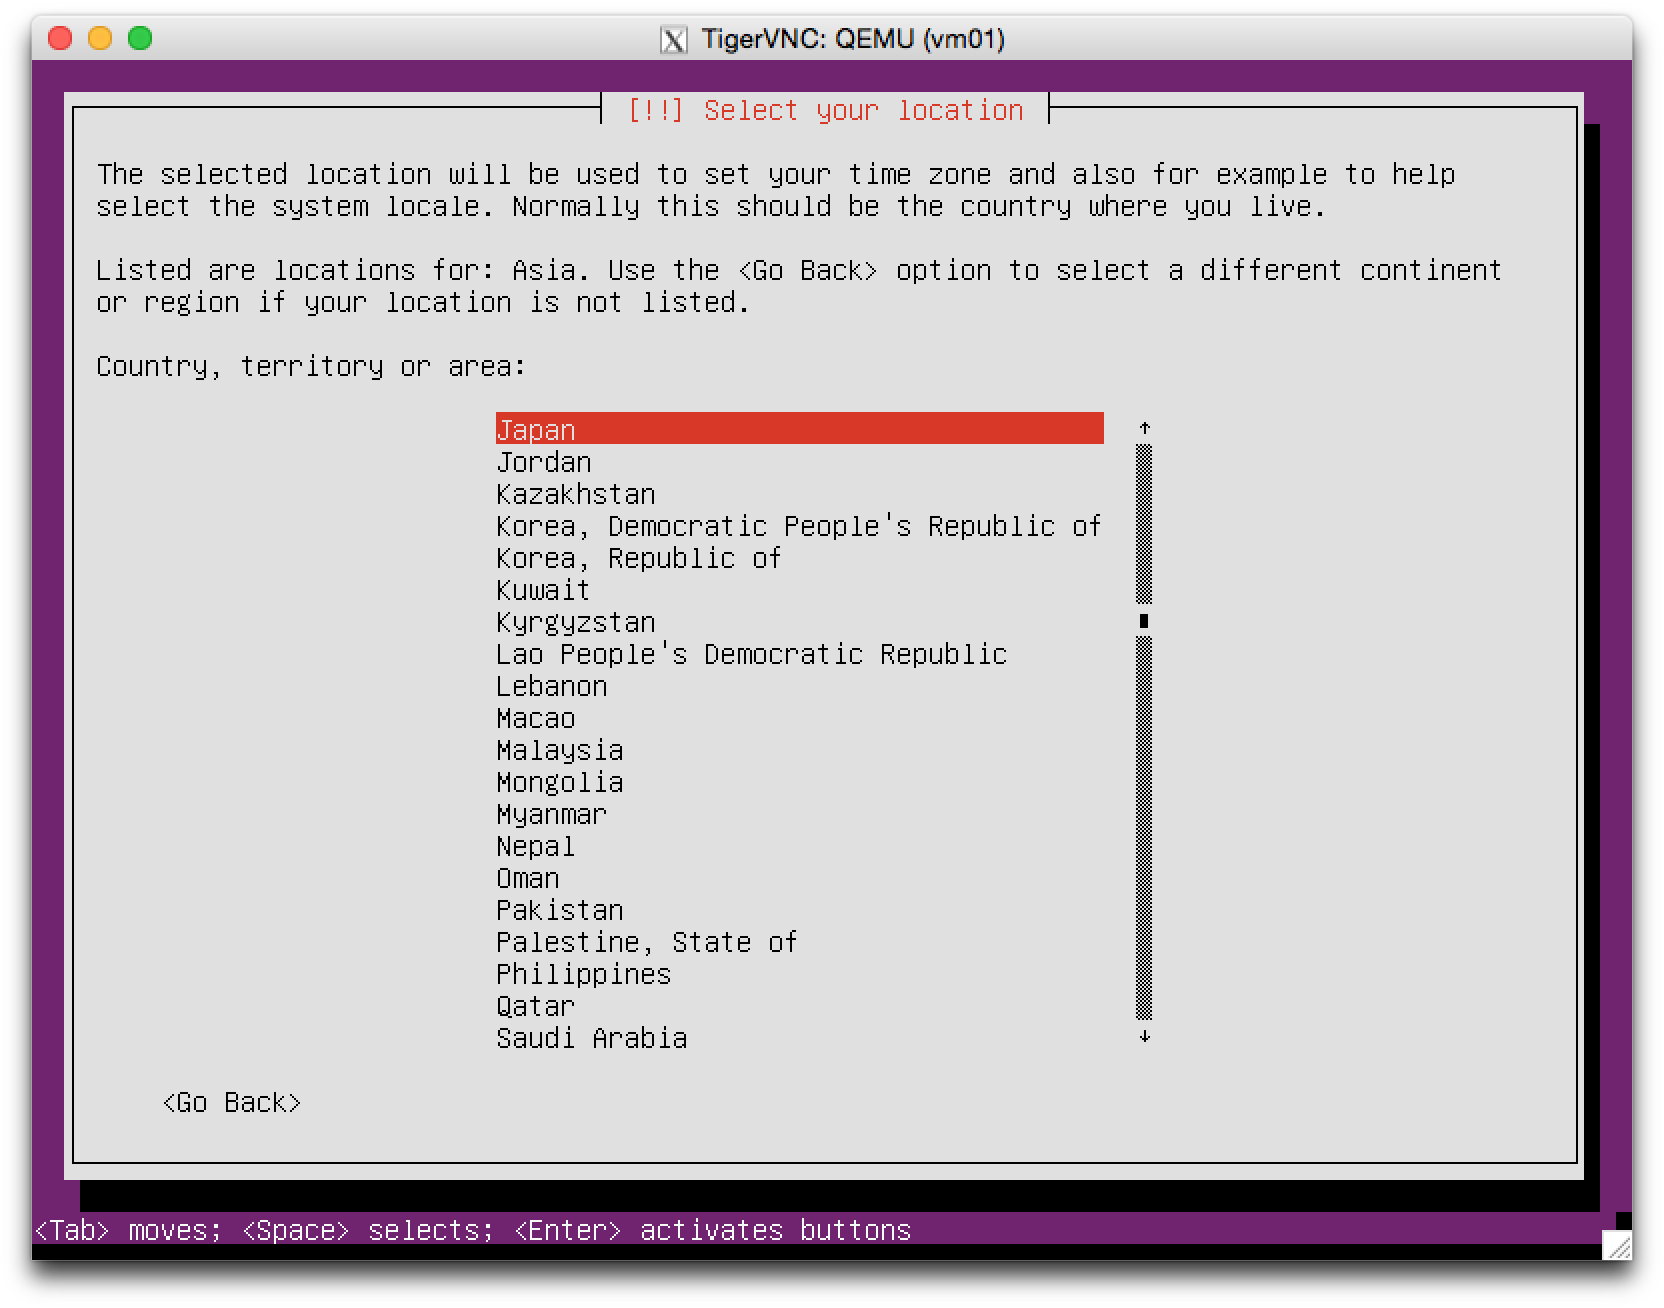
Then, a list of countries shows up, so choose your country from the list.
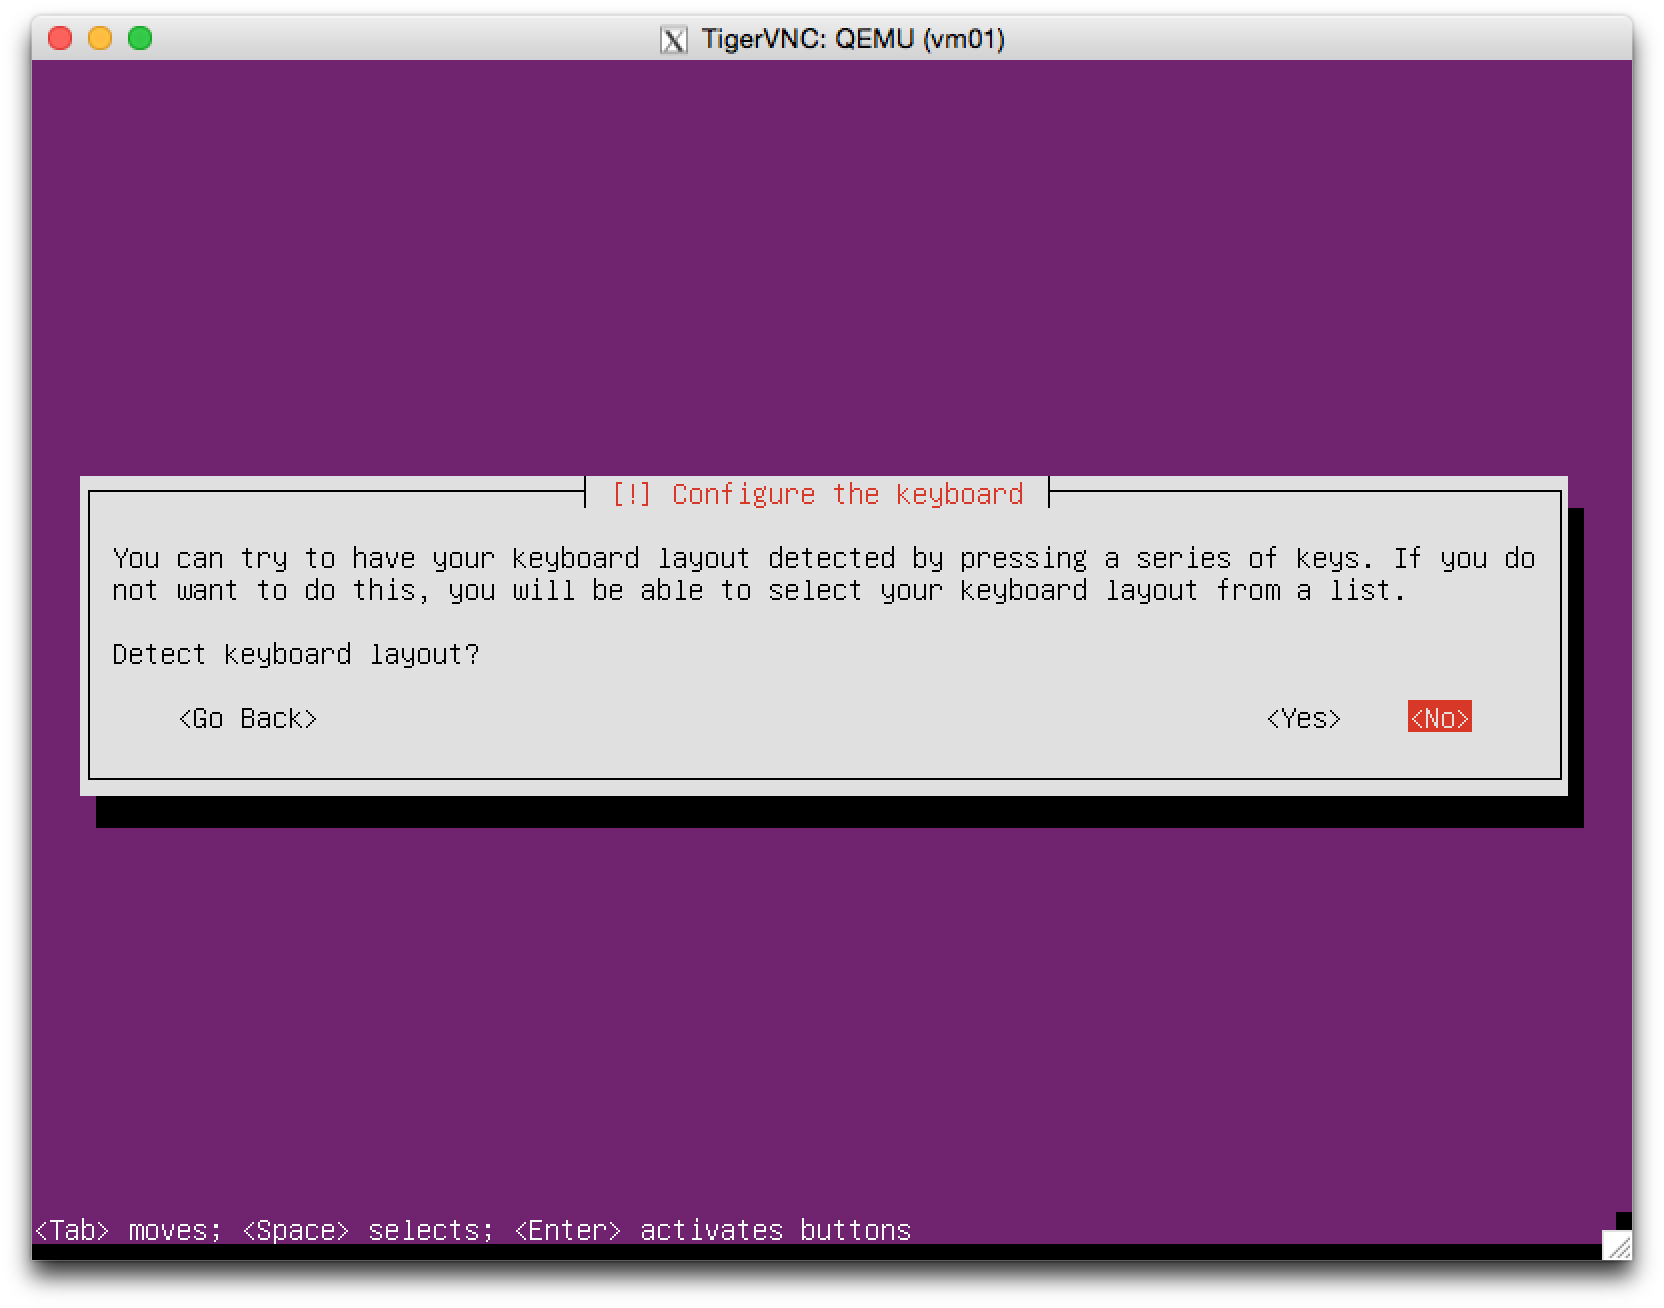
The installer then configure the keyboard layout.
It provides a diagnostic detection mechanism of the keyboard layout
but it may not work well and takes some time rather than manual selection.
Therefore, we recommend you to manually configure the keyboard layout
by choosing “No” here.
Here, you set up your keyboard layout from the list of supported keyboard layouts.
To quickly choose “Japanese”, you can type “J”
to immediately jump to Japanese.
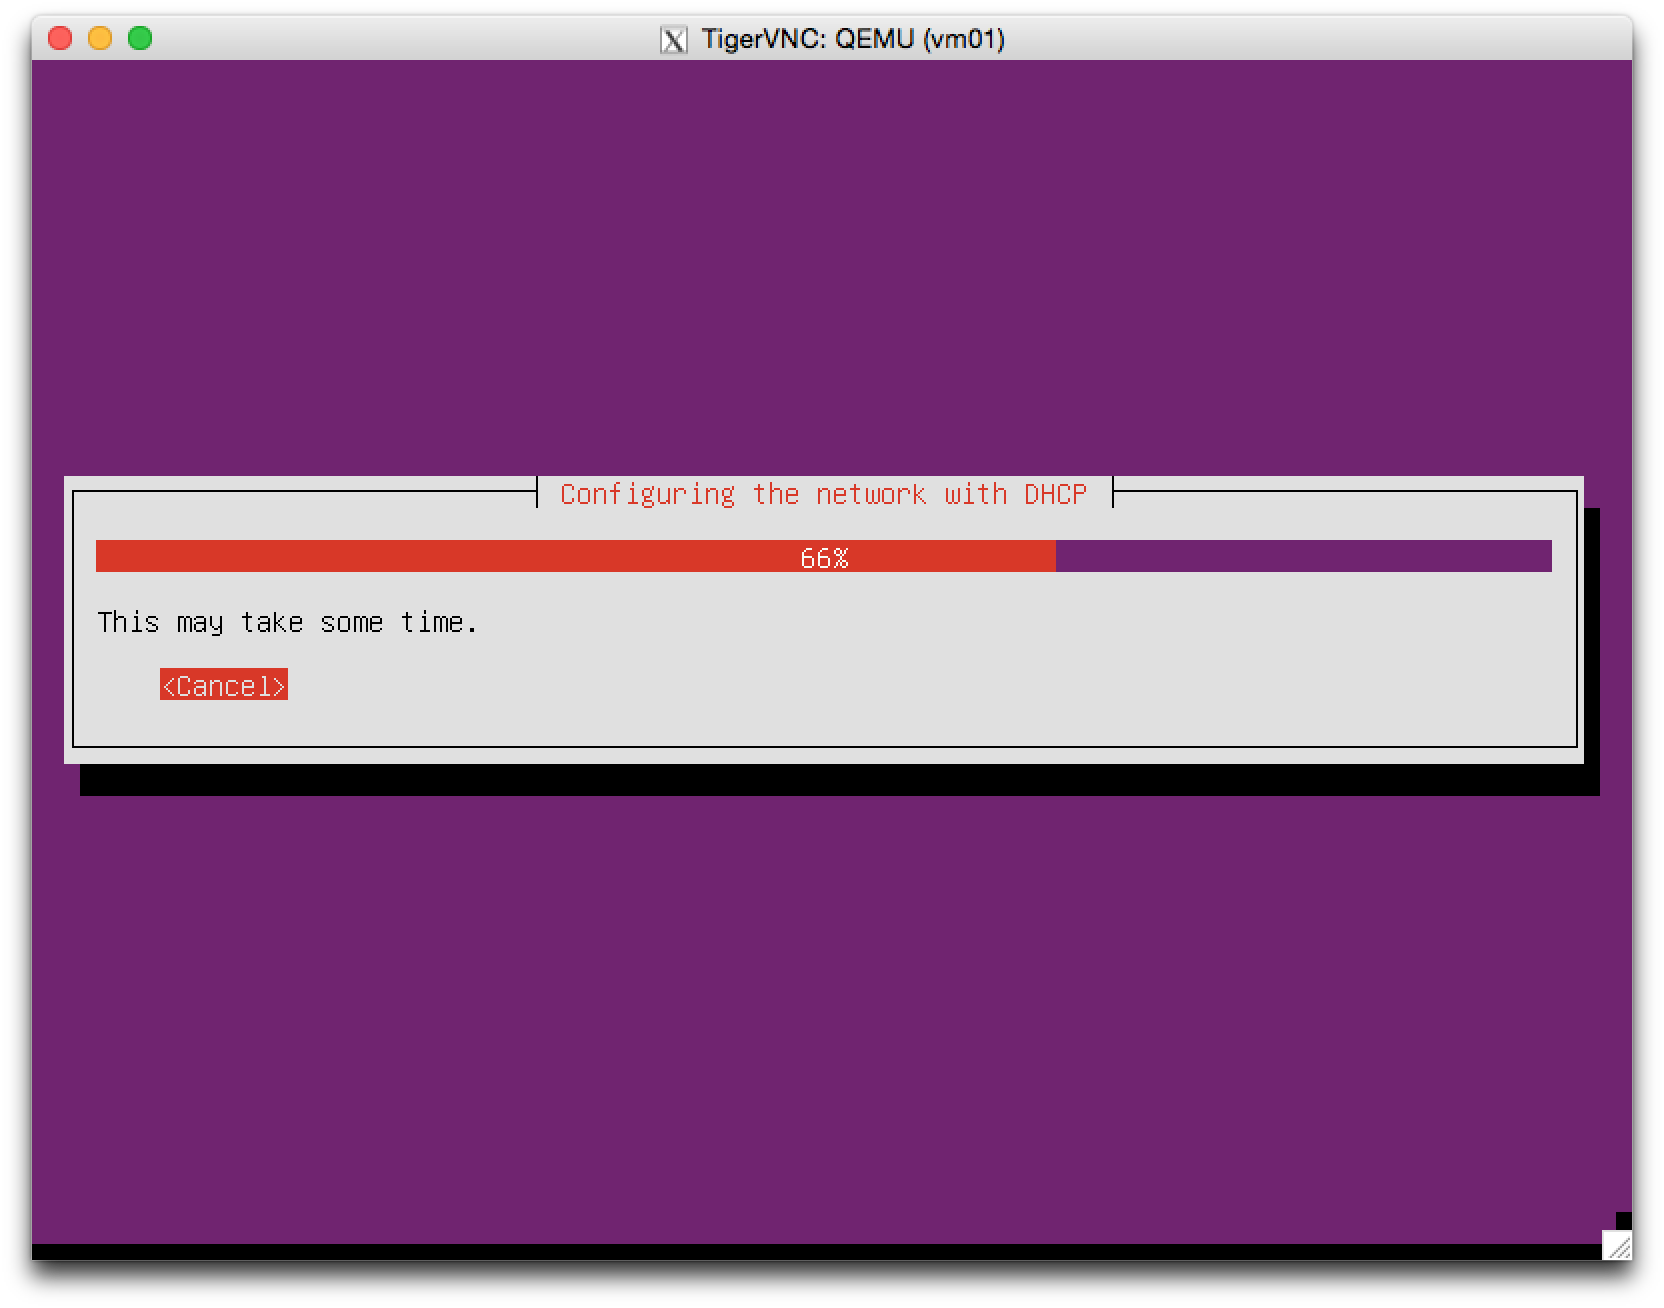
The installer then tries to automatically configure network
using DHCP and IPv6 router advertisement.
The network we use in this course does not provide DHCP
but IPv6 addresses, gateway, and DNS servers are automatically
configured via router advertisement.
Note that IPv6-only network is enough for the installation.
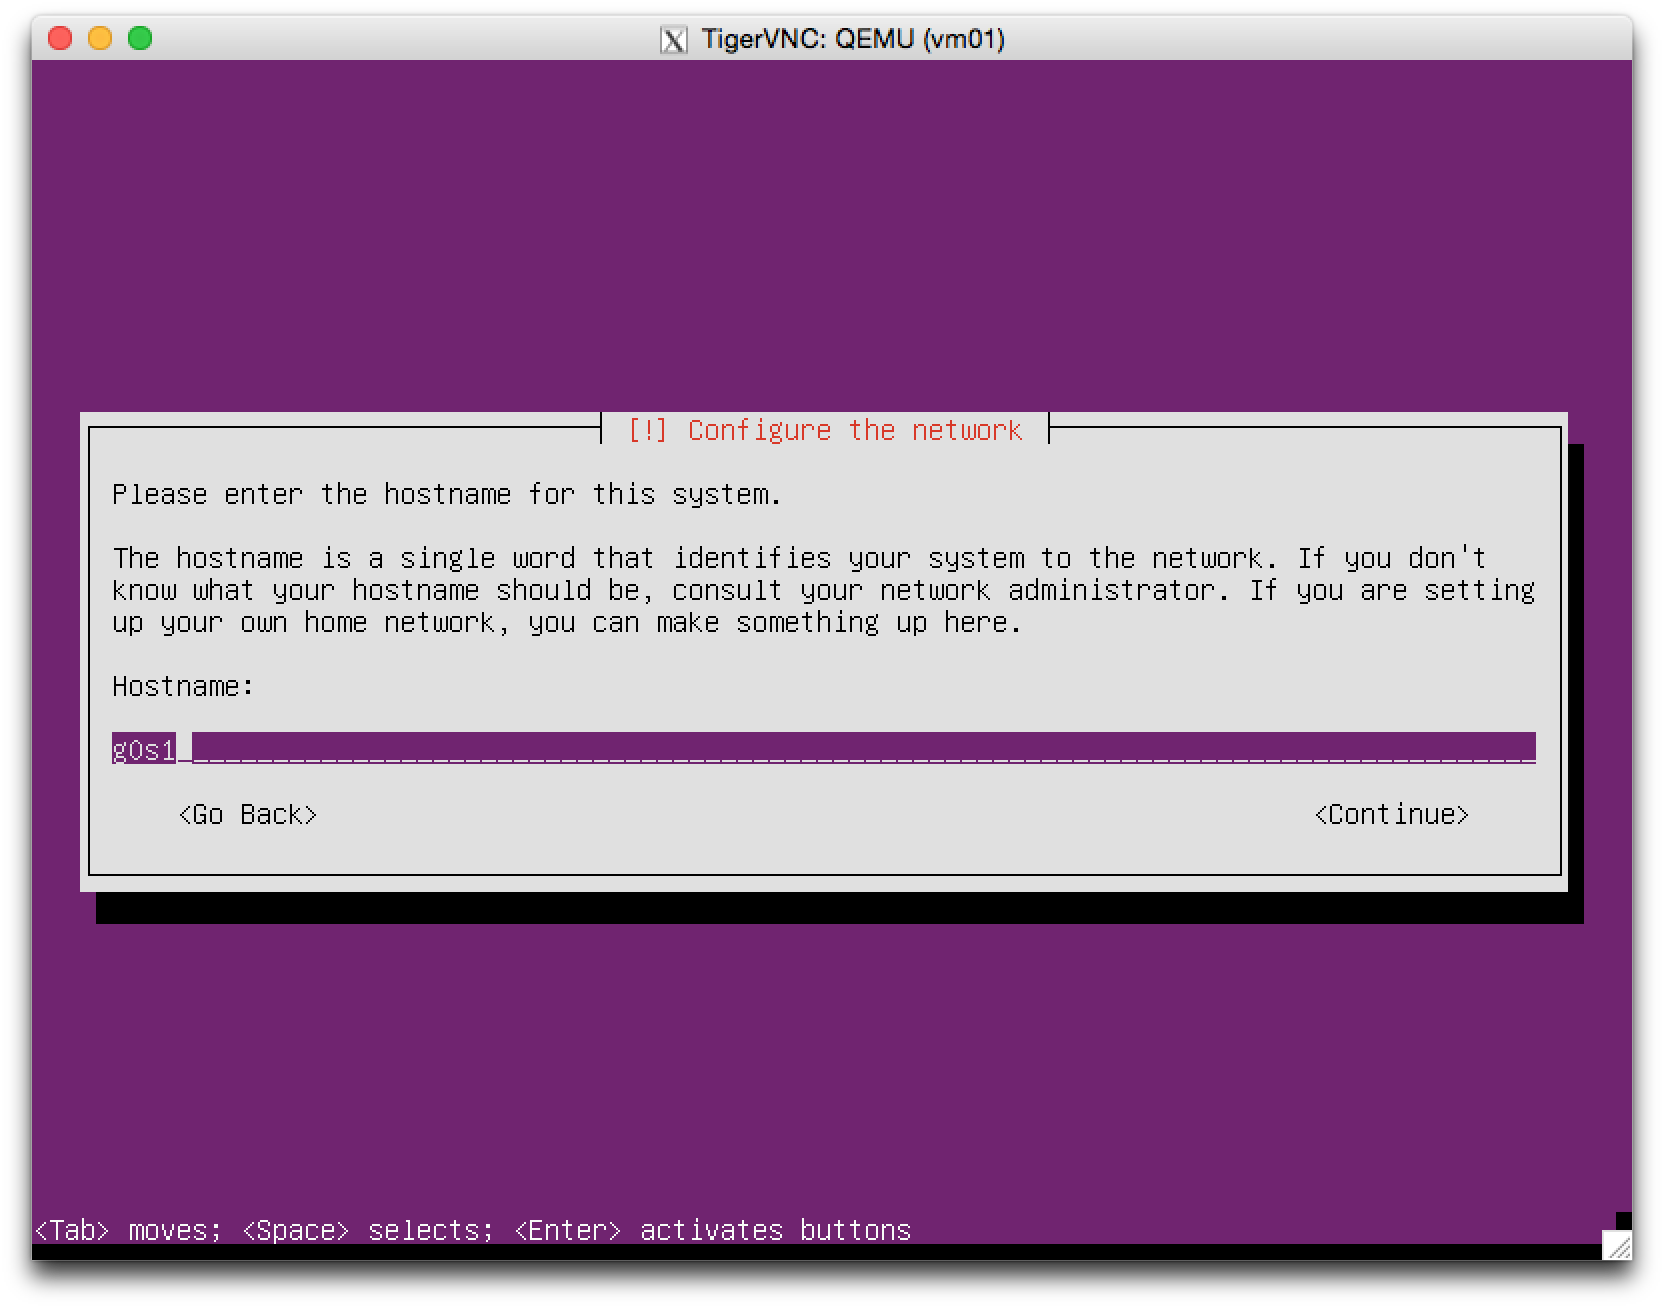
After the network configuration (hopefully completed automatically),
you need to configure your hostname.
In this course, I pre-configure DNS records with the following rule:
gXsY.exp.ci.i.u-tokyo.ac.jp for the server Y (0..9) of the group X (1..8),
thus use that name.
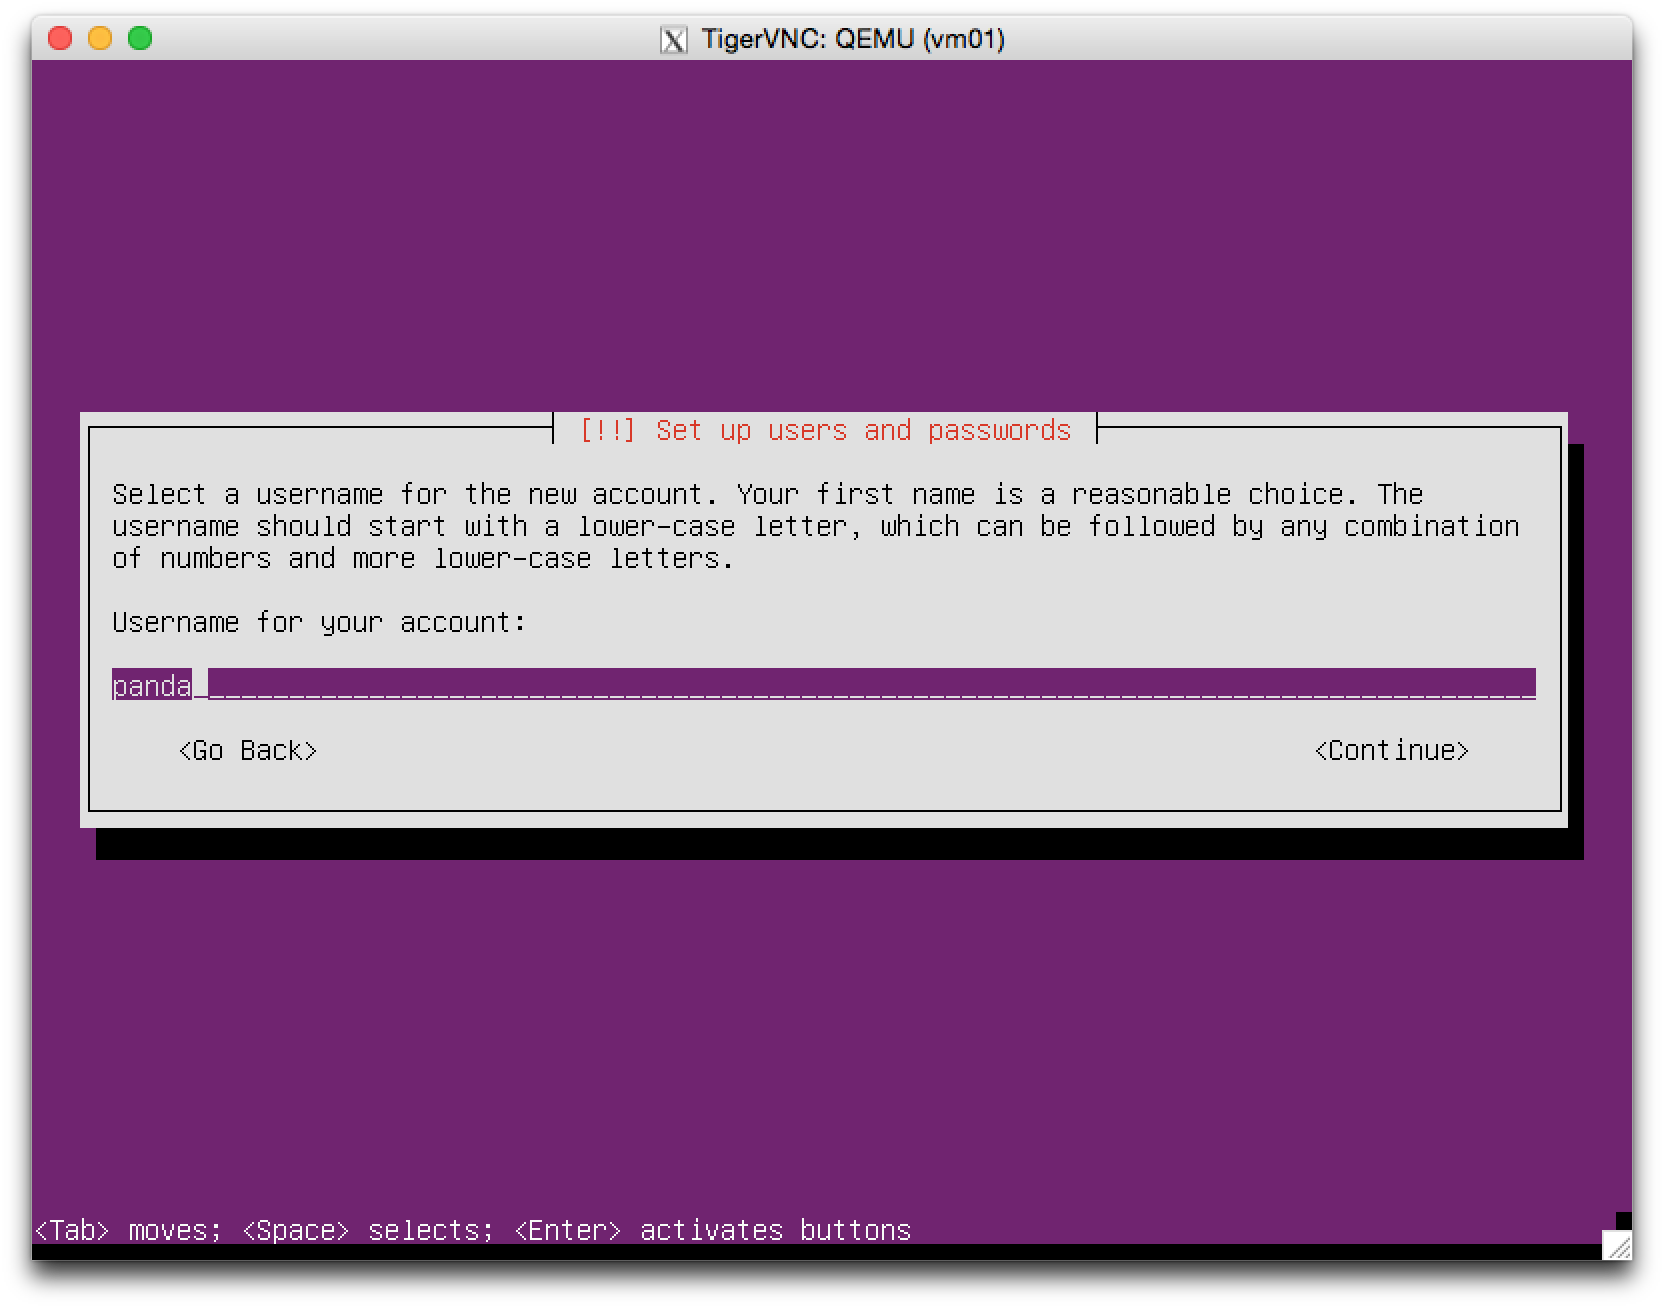
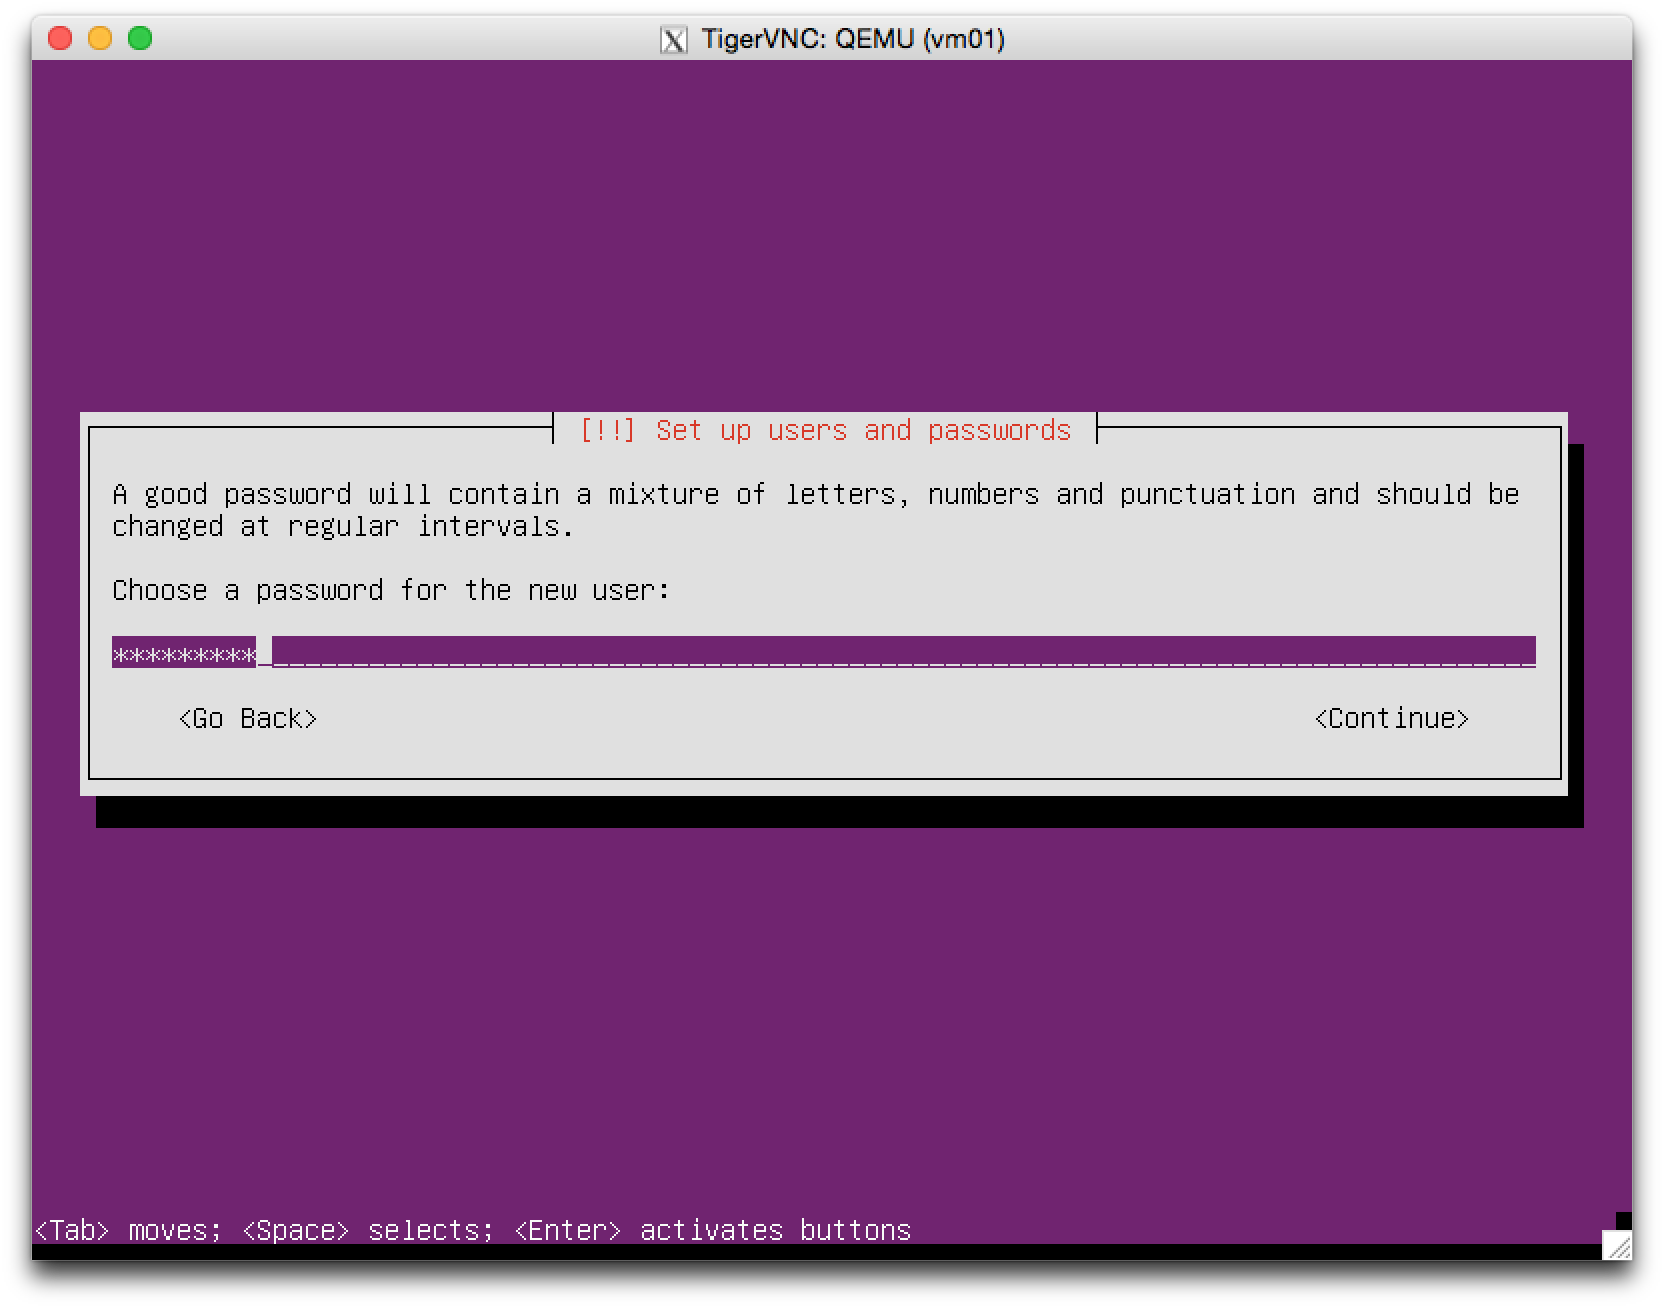
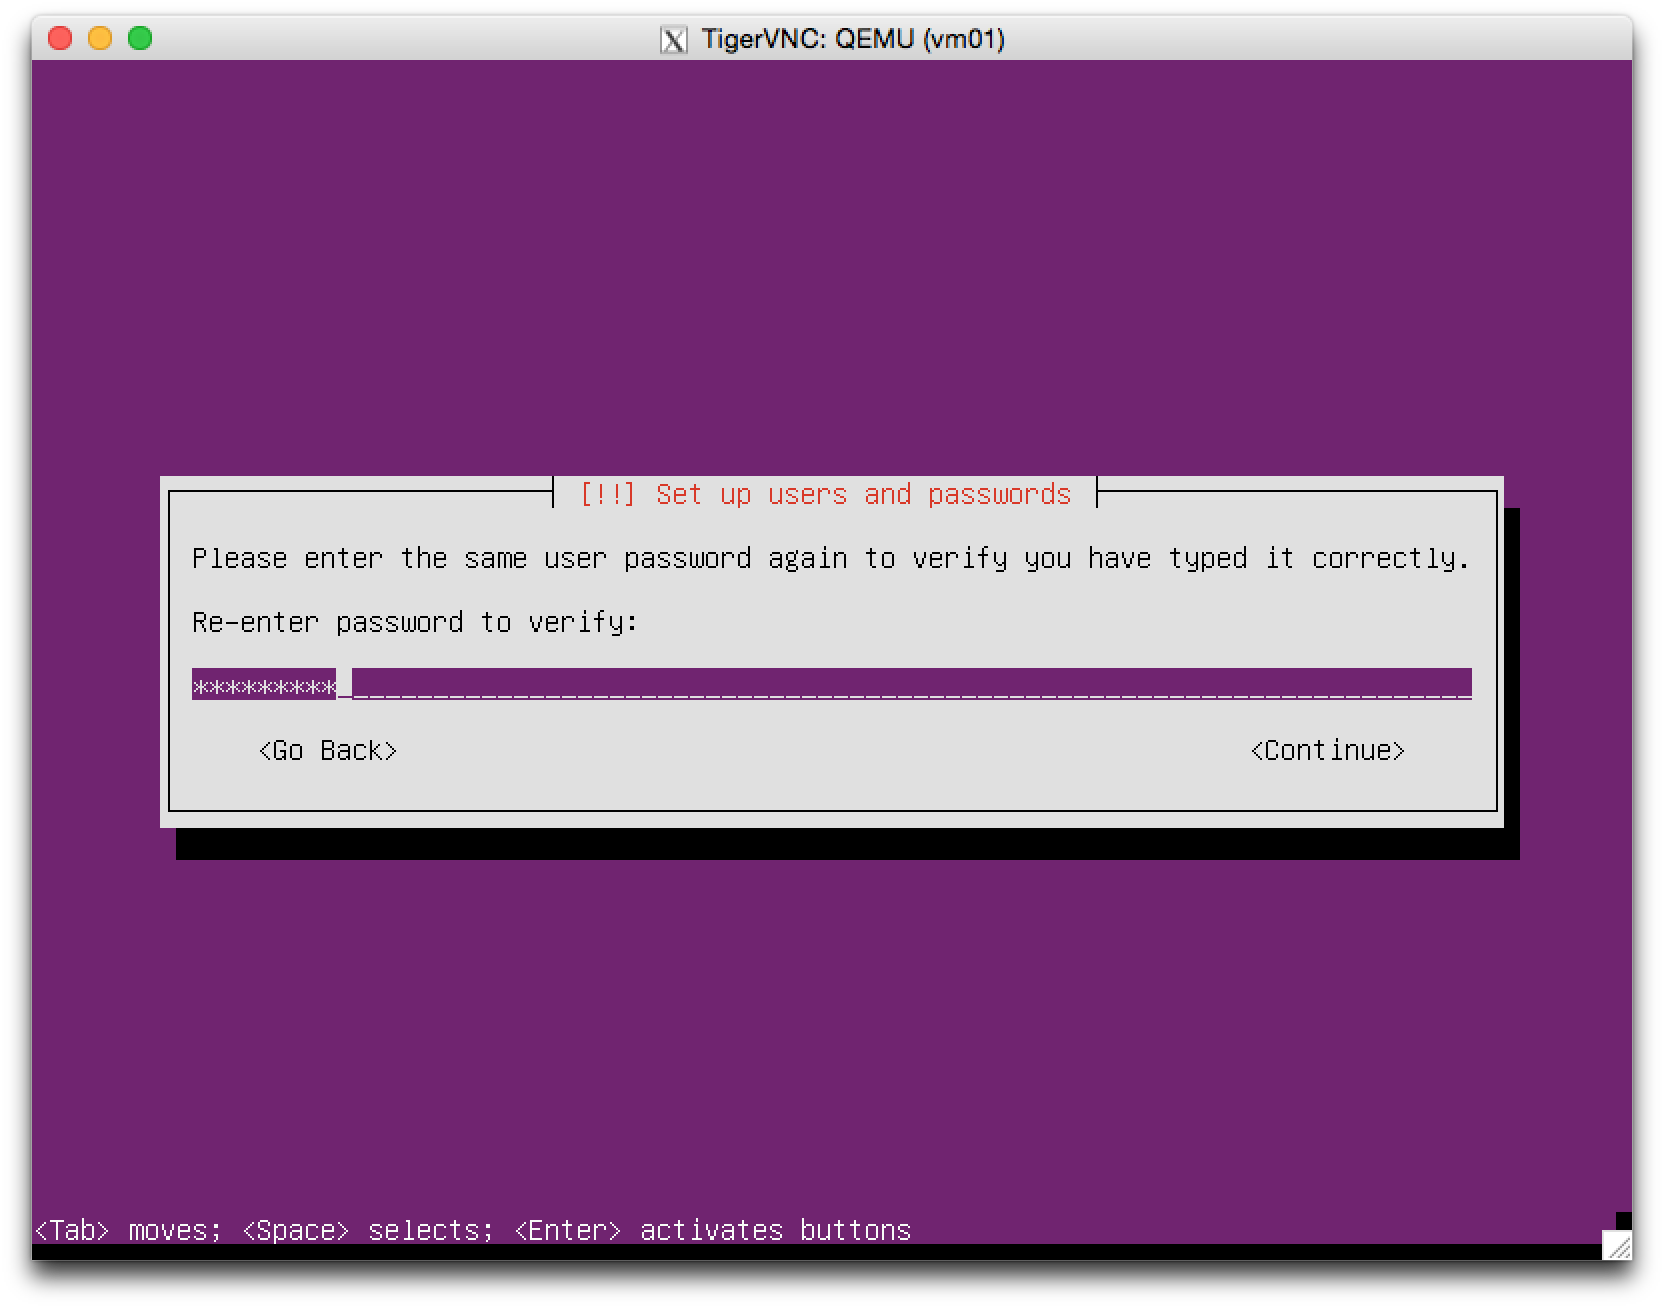
Then, the installer sets up the initial user account.
Please input your (one of your member's) full name,
account name,
password,
and the password again.
The installer initializes and formats the disk (and partitions).
It first asks you the encryption option of home directories.
We do not need the encryption in this course
so you can choose “No”.
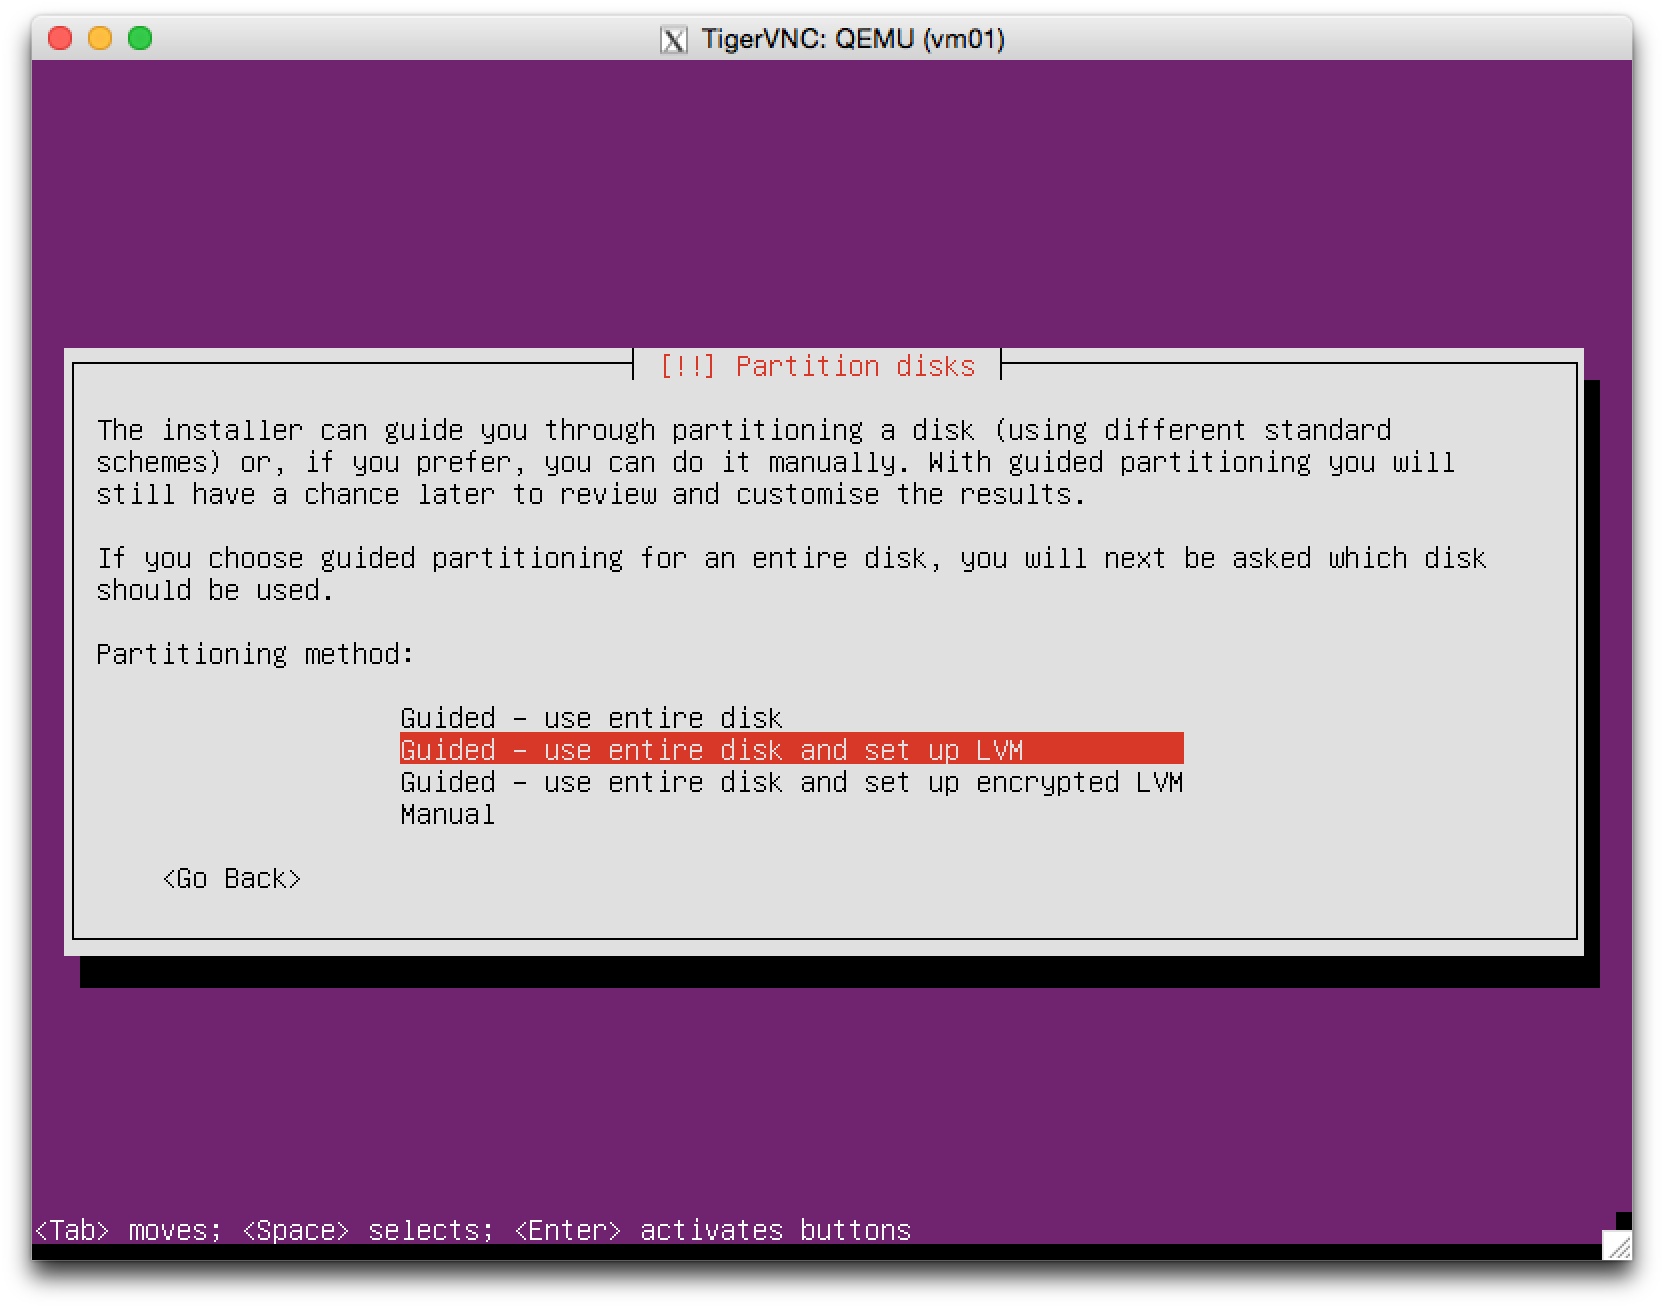
Then, it goes to the disk partition setting.
We can use the entire disk so the first, second, or third option is easy and suitable.
In this course, we use the second one (default), “Guided – Use entire disk and set up LVM”.
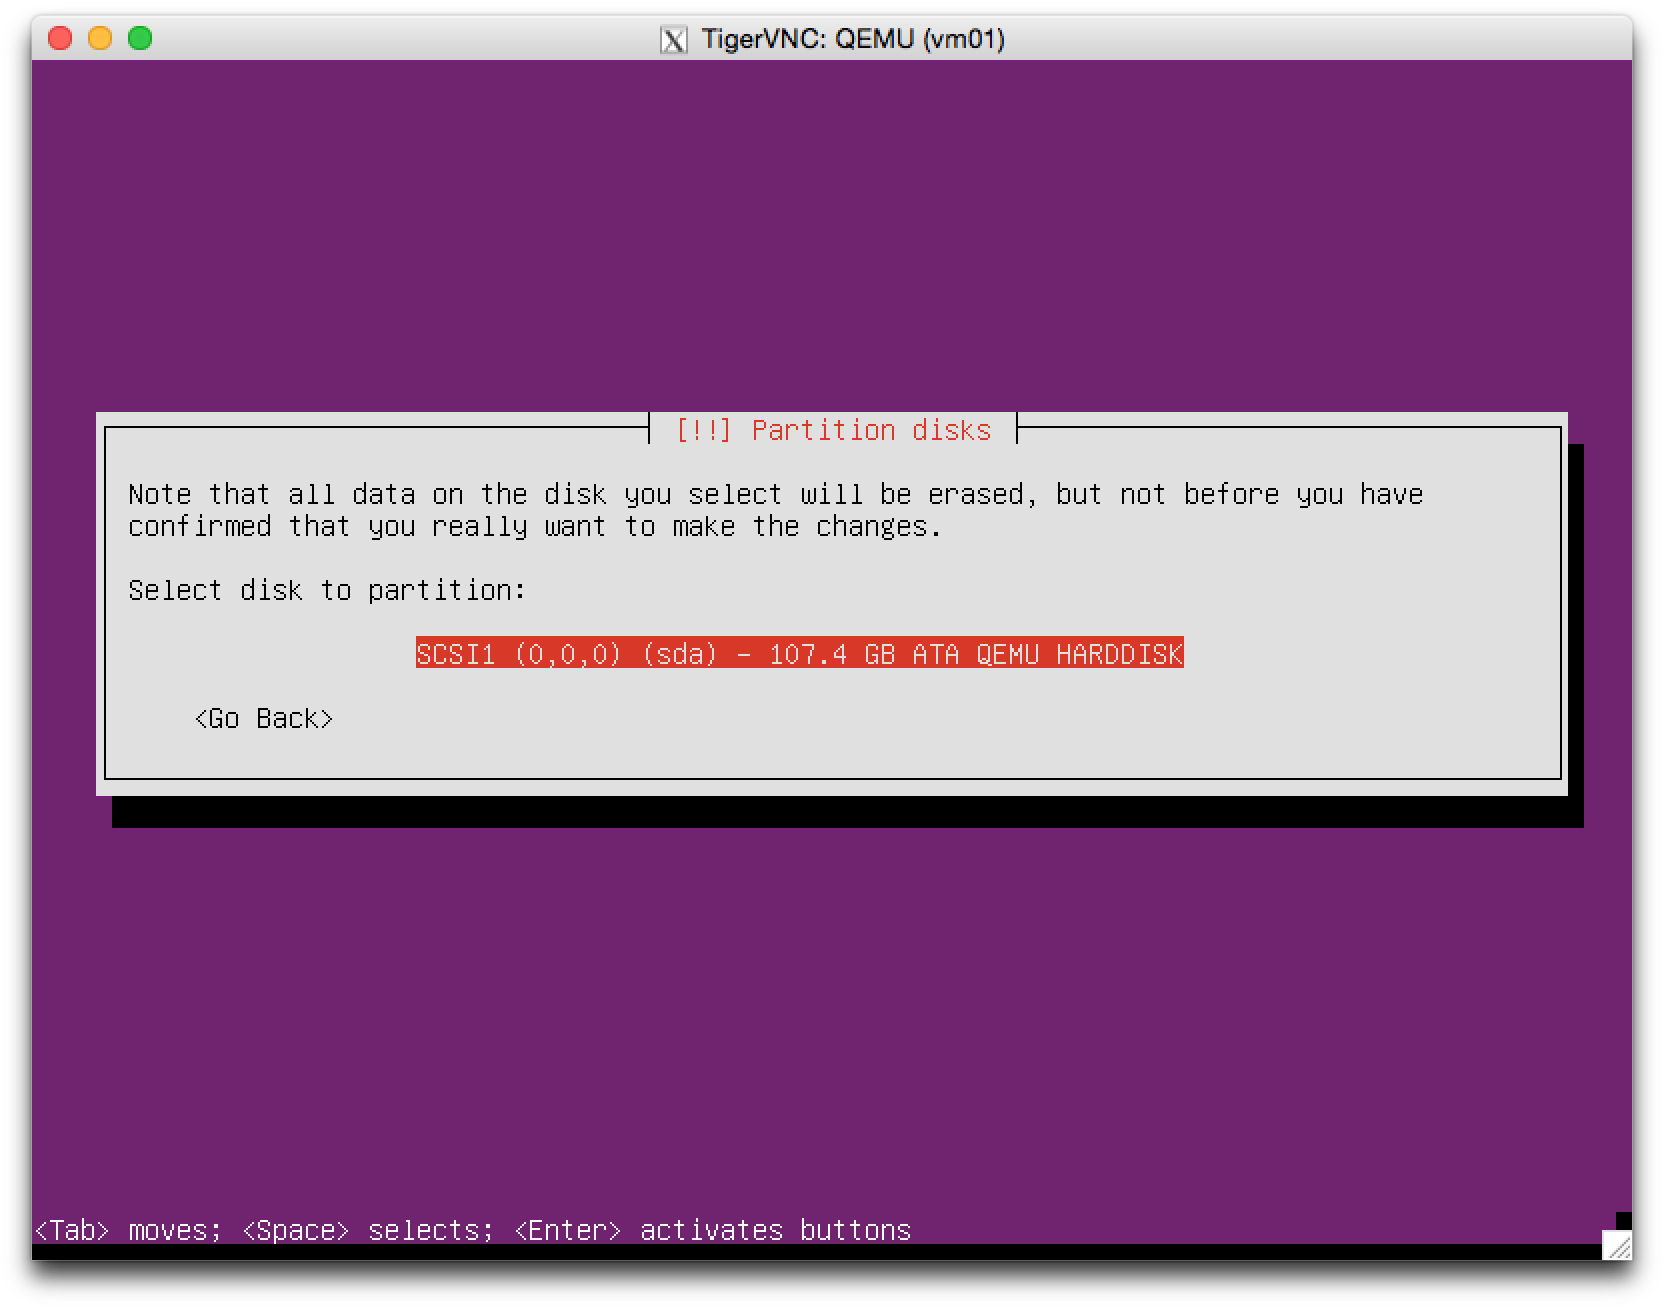
The installer also asks you the installation target disk
that will be partitioned according to the partition setting above.
In this course, we only have one disk, so nothing to worry about here.
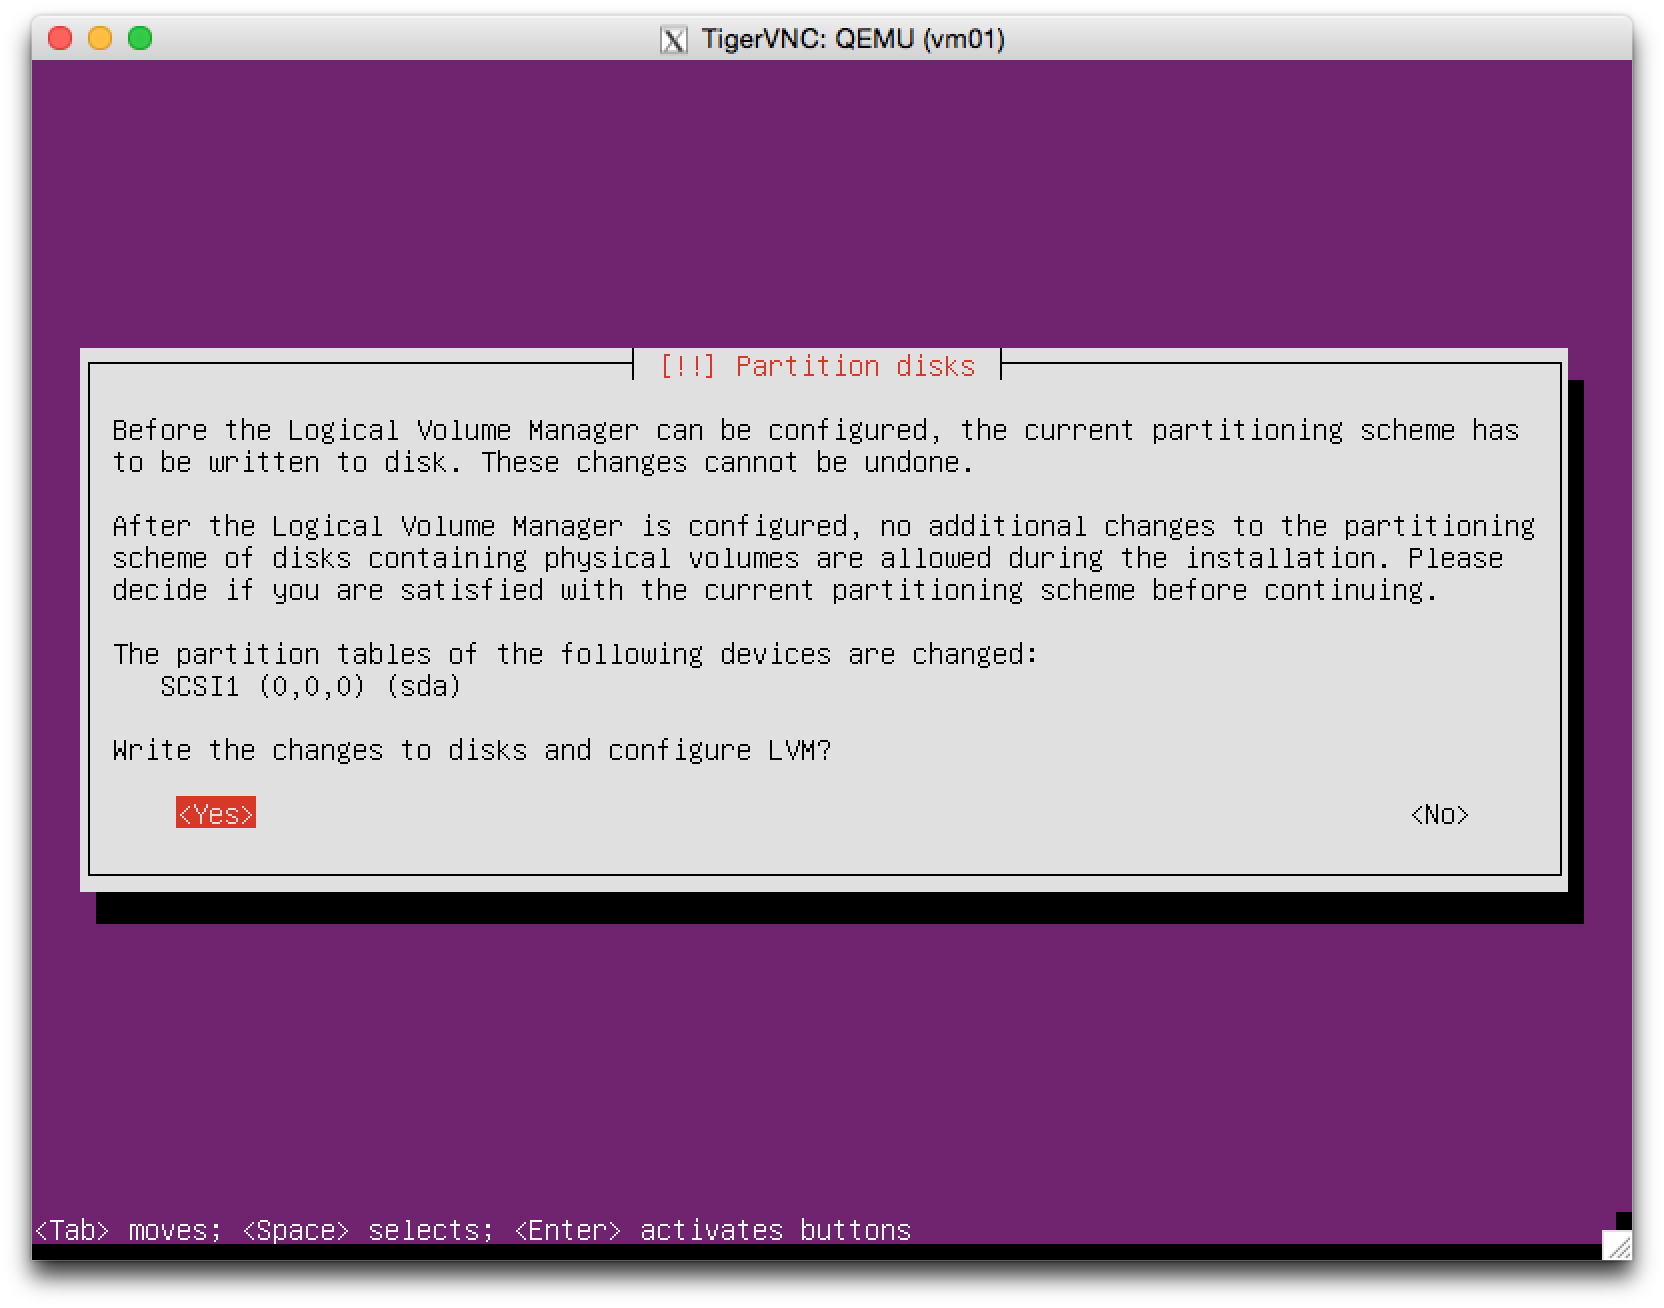
Since the disk/partition format would never roll back,
the installer asks you to format the disk here before formatting the disk.
If the change is what you intend, choose “Yes&rdquo.
Once note that use caution before choosing “Yes”;
some parts of data in the disk will be overwritten
and other data are really hard to be recovered after this operation.
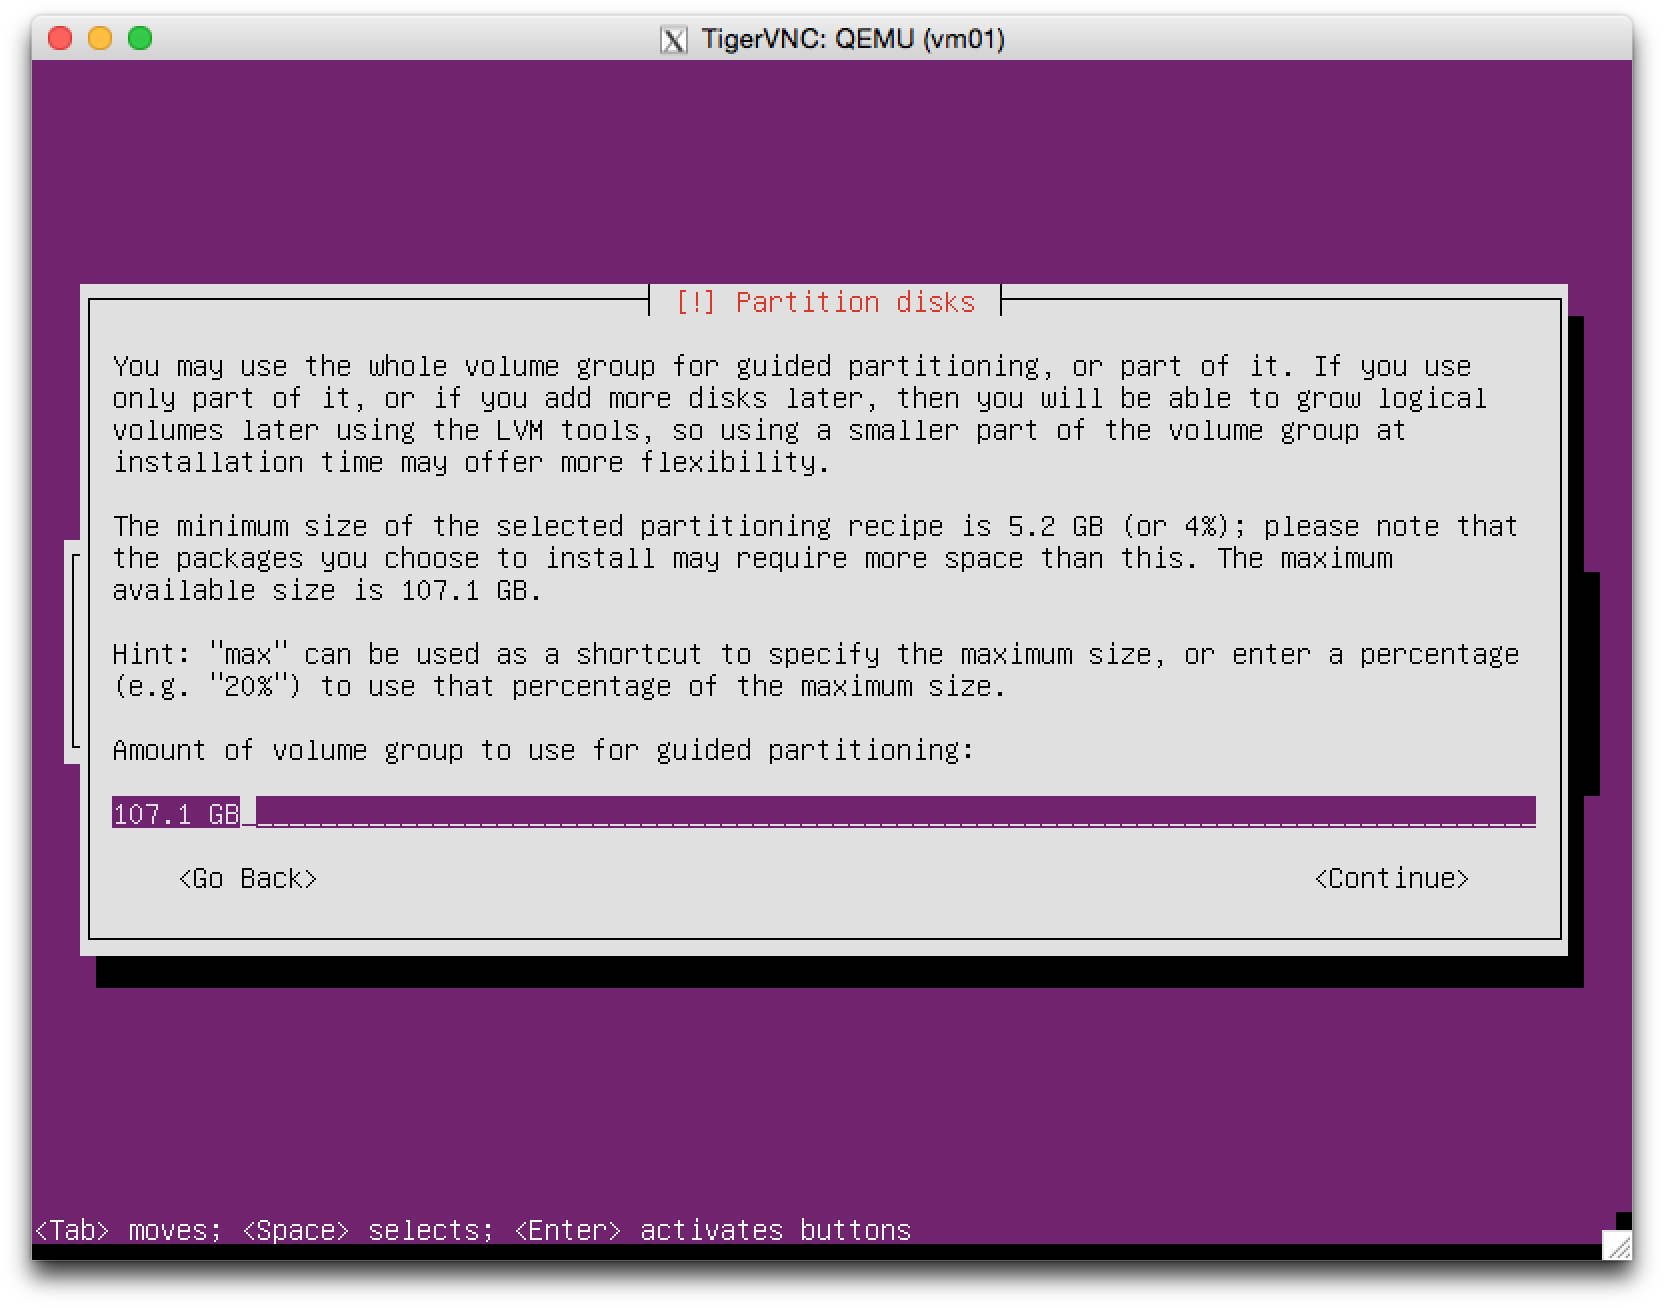
Although we choose to use the entire disk before,
the installer asks it to us again (for an LVM's logical volume group).
The default value is the maximum size of usable partition size,
so leave it default.
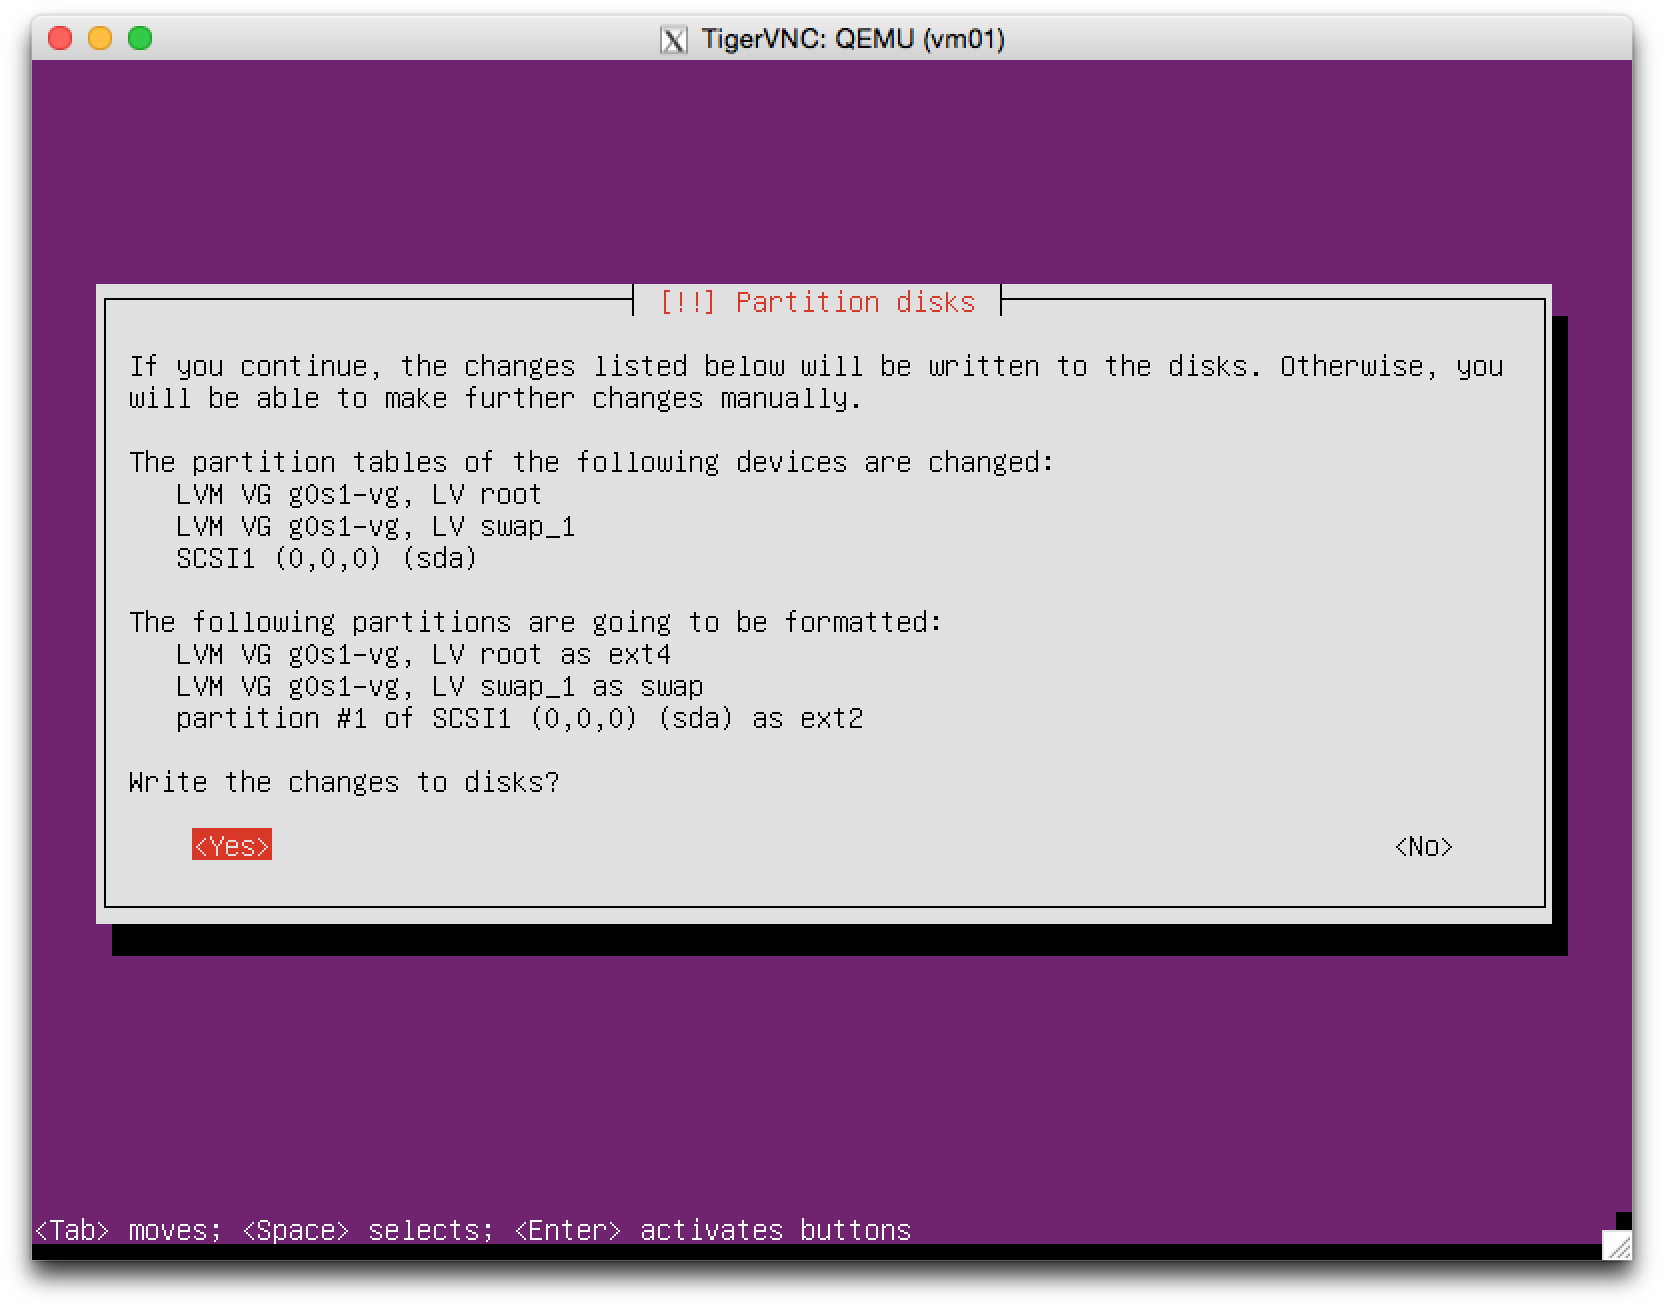
The disk format is done after the installation step 17
but the volume configuration and partitioning are undone when we use LVM.
To complete it, you need to choose “Yes” here.
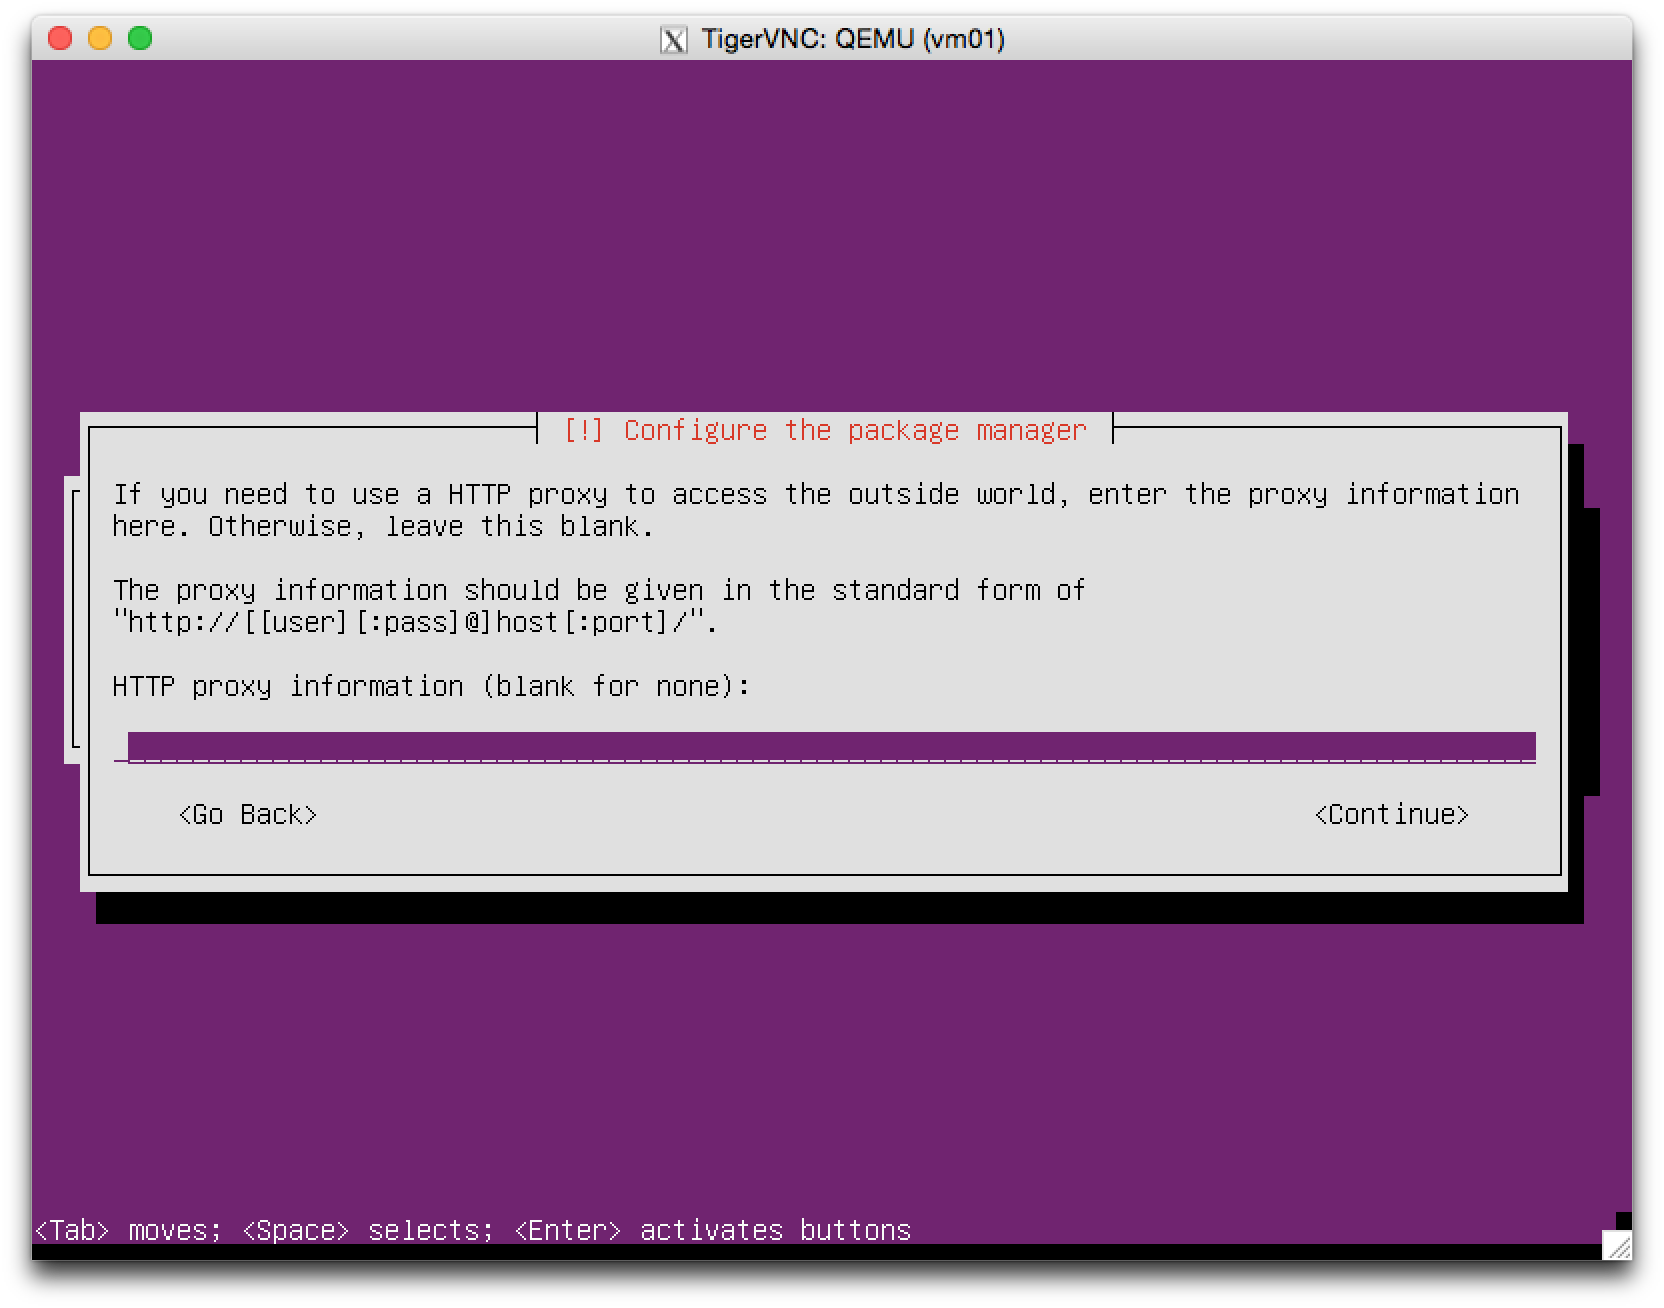
The installer will install packages you want.
These packages are downloaded via HTTP, so you can set a proxy server.
In this course, we do not need to use any proxy servers, so leave it blank.
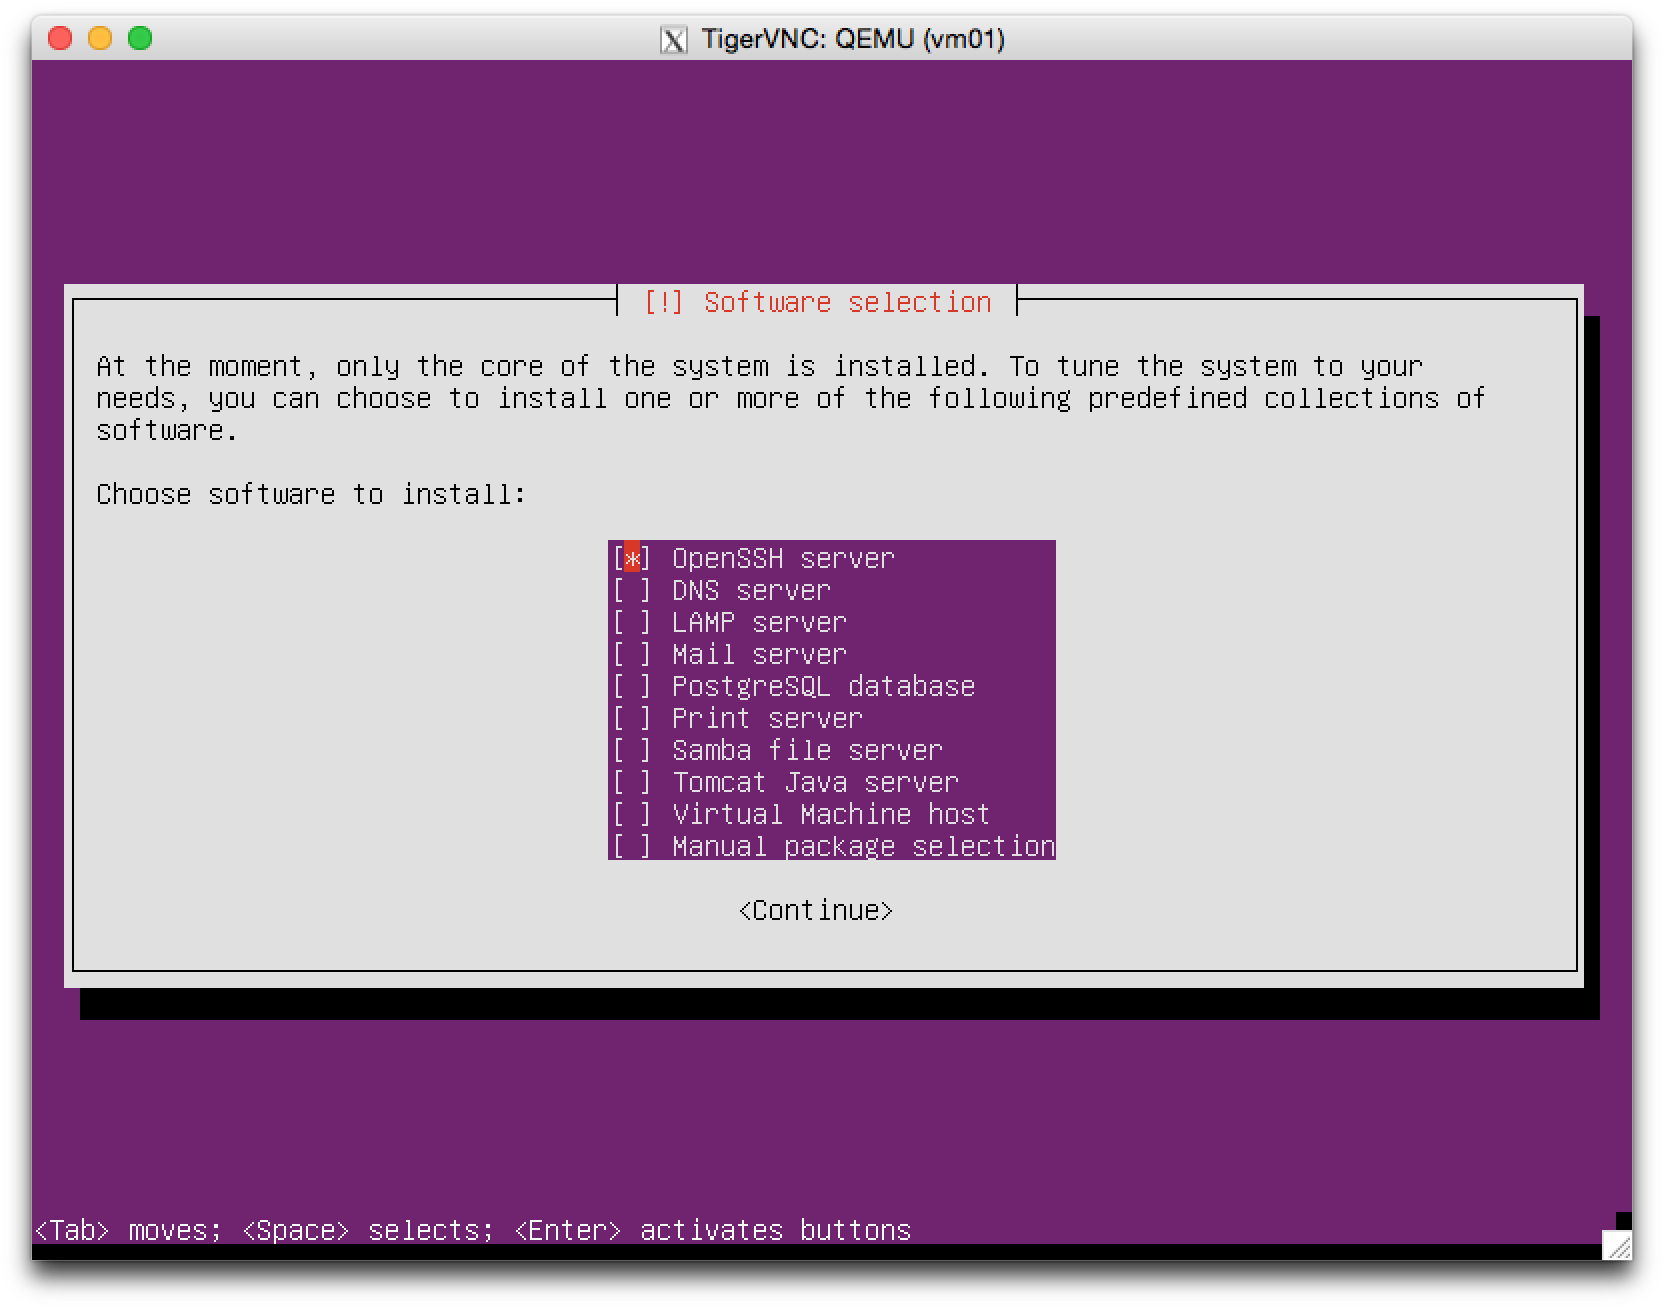
Packages can be installed later, but I recommend you
to install OpenSSH server because we will use it soon
for remote login.
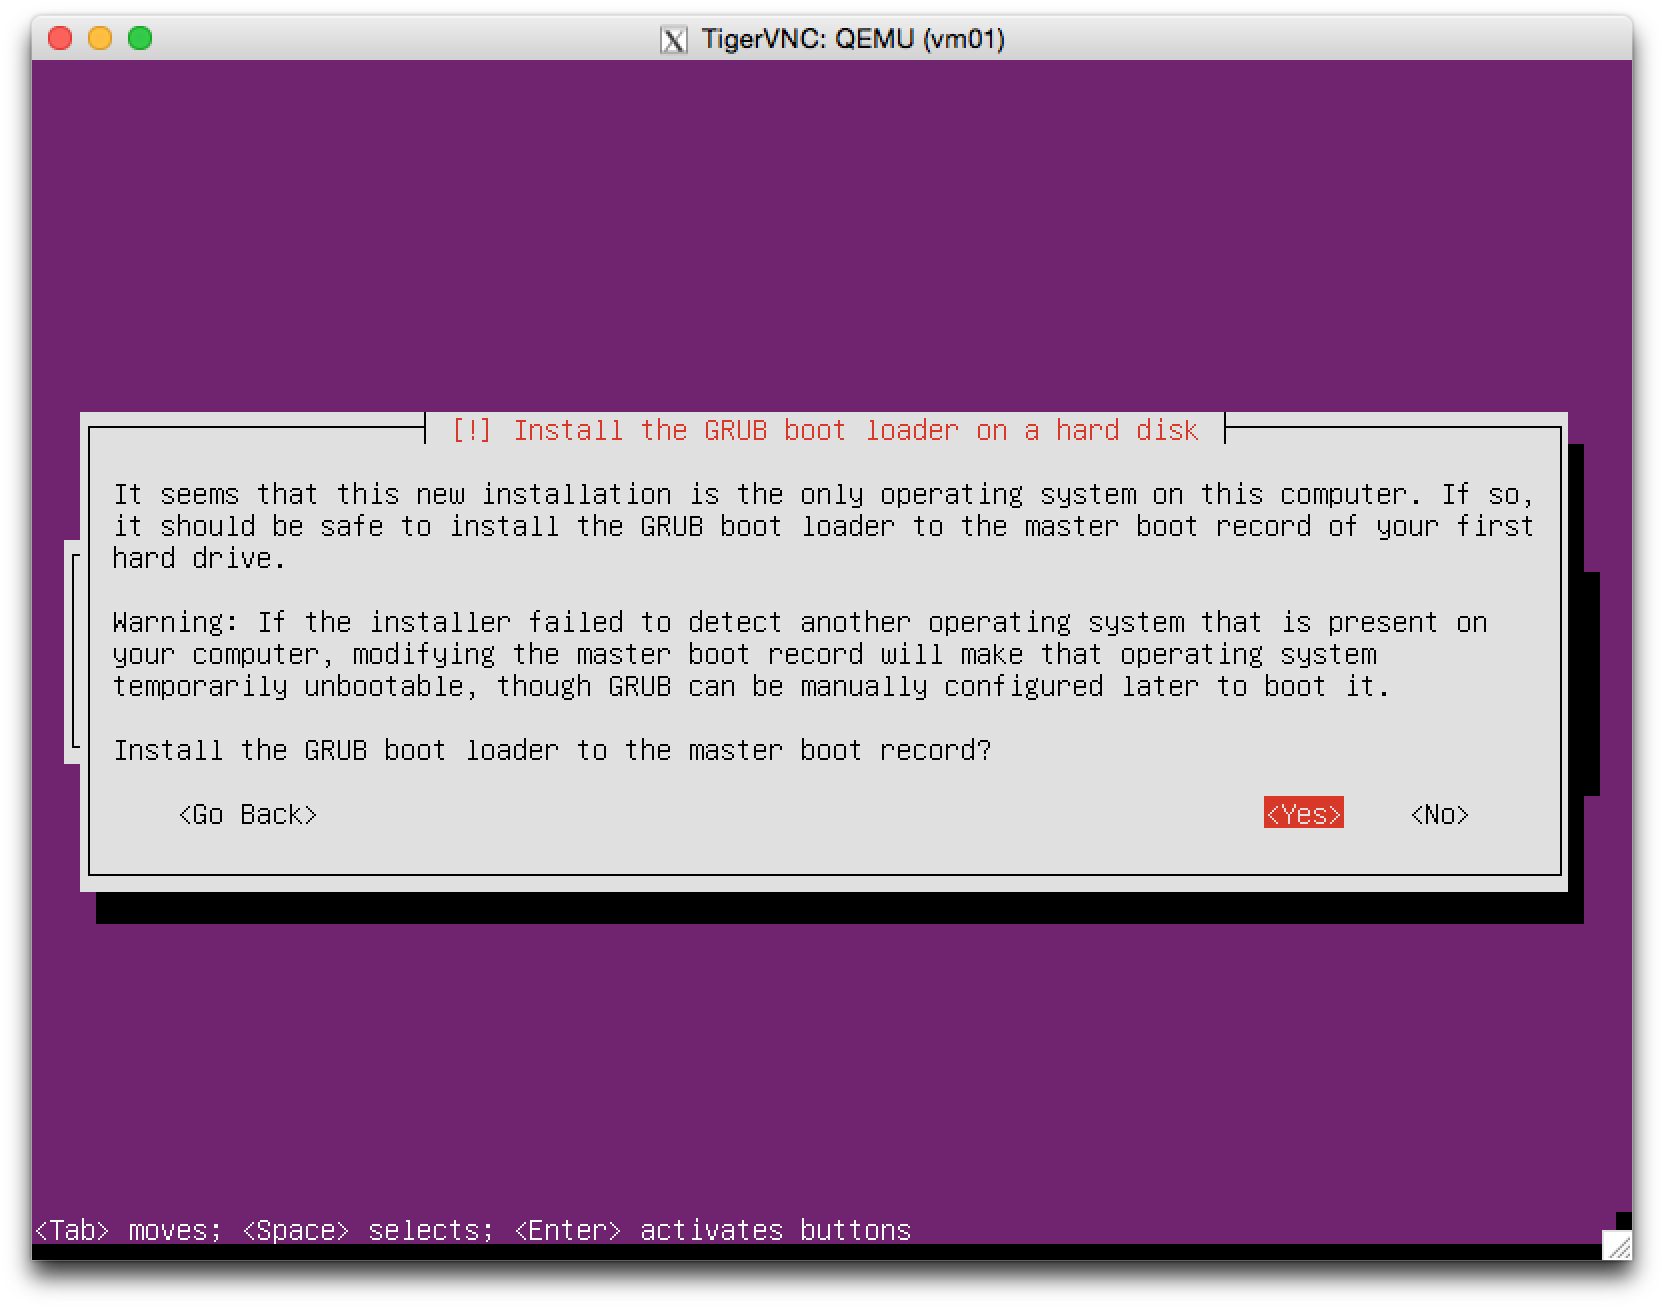
The Linux operating system cannot be booted without a boot loader.
GRUB is commonly used as the boot loader for Linux operating system.
Therefore, you must choose “Yes” to install and set up GRUB.
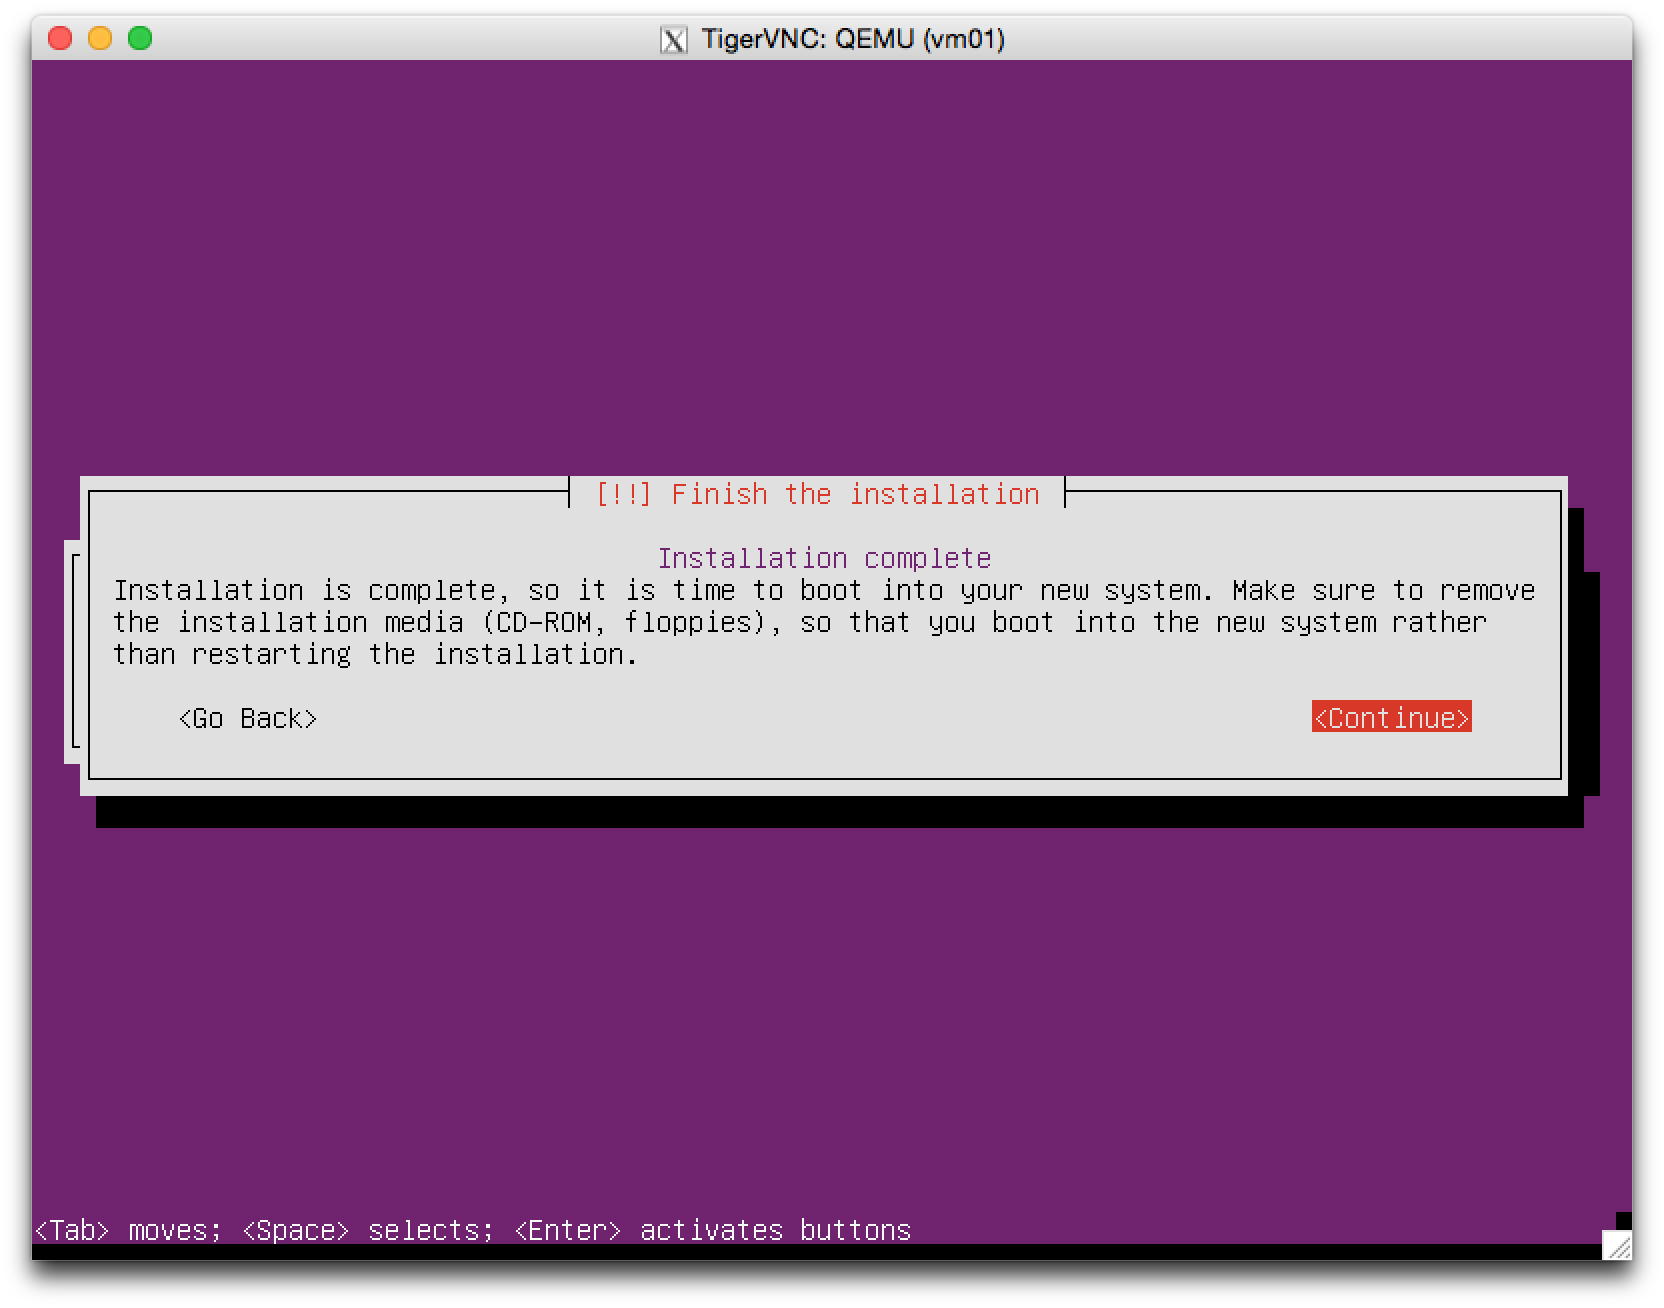
The installation is now completed.
The system will be rebooted after choosing “Continue”.
The installation step 1: Select your language (English is recommended.)The installation step 2: Launch the installer by selecting “Install Ubuntu Server”The installation step 3: Select the localization option (language) for the installed system.
“C” is recommended for Japanese students. “Japanese” is sometimes troublesome for the command line operation.The installation step 4: Select the region of your location for timezone settingThe installation step 5: Select your country for timezone settingThe installation step 6: Keyboard configuration option.
Choosing “No” is recommended because the detection of keyboard may not work well and takes some time rather than manual selection.The installation step 7: Manual configuration of the keyboard layoutThe installation step 8: Network configuration (nothing to do here)The installation step 9: Hostname configurationThe installation step 10: Initial user configuration (full name)The installation step 11: Initial user configuration (account name)The installation step 12: Initial user configuration (password)The installation step 13: Initial user configuration (password confirmation)The installation step 14: Home directory encryption setting (we do not need it in this course so just choose “No”.)The installation step 15: Disk partition setting.
We can use the entire disk so the first, second, or third option is easy and suitable.
In this course, we use the second one (default), “Guided – Use entire disk and set up LVM”.The installation step 16: System disk selectionThe installation step 17: Disk format confirmationThe installation step 18: LVM volume group size configurationThe installation step 19: Volume and partition format confirmationThe installation step 20: Proxy server setupThe installation step 21: Package selectionThe installation step 22: GRUB (boot loader) installationThe installation step 23: The installation completed
Fundamental Setup
Network Configuration
You need to configure your host's IP address after the installation.
The network configuration is changed by editing /etc/network/interfaces.
In this course, we will use static IP address for these hosts,
and the following is the template of the configuration file.
Note that you need to change the address 157.82.3.1XY
to an appropriate one.
# This file describes the network interfaces available on your system
# and how to activate them. For more information, see interfaces(5).

# The loopback network interface
auto lo
iface lo inet loopback

# The primary network interface ## Note that eth0 may be em1 in your environment.
auto eth0
iface eth0 inet static
        address 157.82.3.<1XY>
        netmask 255.255.255.0
        network 157.82.3.0
        broadcast 157.82.3.255
        gateway 157.82.3.1
        dns-nameservers 133.11.169.11 157.82.3.2
        dns-search exp.ci.i.u-tokyo.ac.jp
# This is an autoconfigured IPv6 interface
iface eth0 inet6 auto
SSH configuration
Now the host can be accessed from remote hosts (because we install
OpenSSH server in the installation procedure).
This also means that your host is exposed to risk of remote attacks.
To secure your host against these attacks,
we disable password authentication and use public key authentication instead.
To disable password authentication, edit the /etc/ssh/sshd_config file
as follows;